Brownies: Marshmallow Fluff and Cheesecake Candy Bar

Tags

, , , , ,

We recently went over to our friend’s house for a good old fashioned BBQ; nothing too fancy just burgers and dogs. Our gracious hosts of course said don’t worry about bringing anything, but there was no way I was going to miss the opportunity to bake something.  These are my favorite moments when I can make something yummy, have a few bites and then leave the rest of the dessert on someone else counter. I don’t know about you, but when something yummy is on my counter it calls to me all the time and I have very little restraint.

Since I couldn’t decide which type of brownies to make, I made two batches!

Marshmallow Fluff BrowniesMarshmallow Fluff

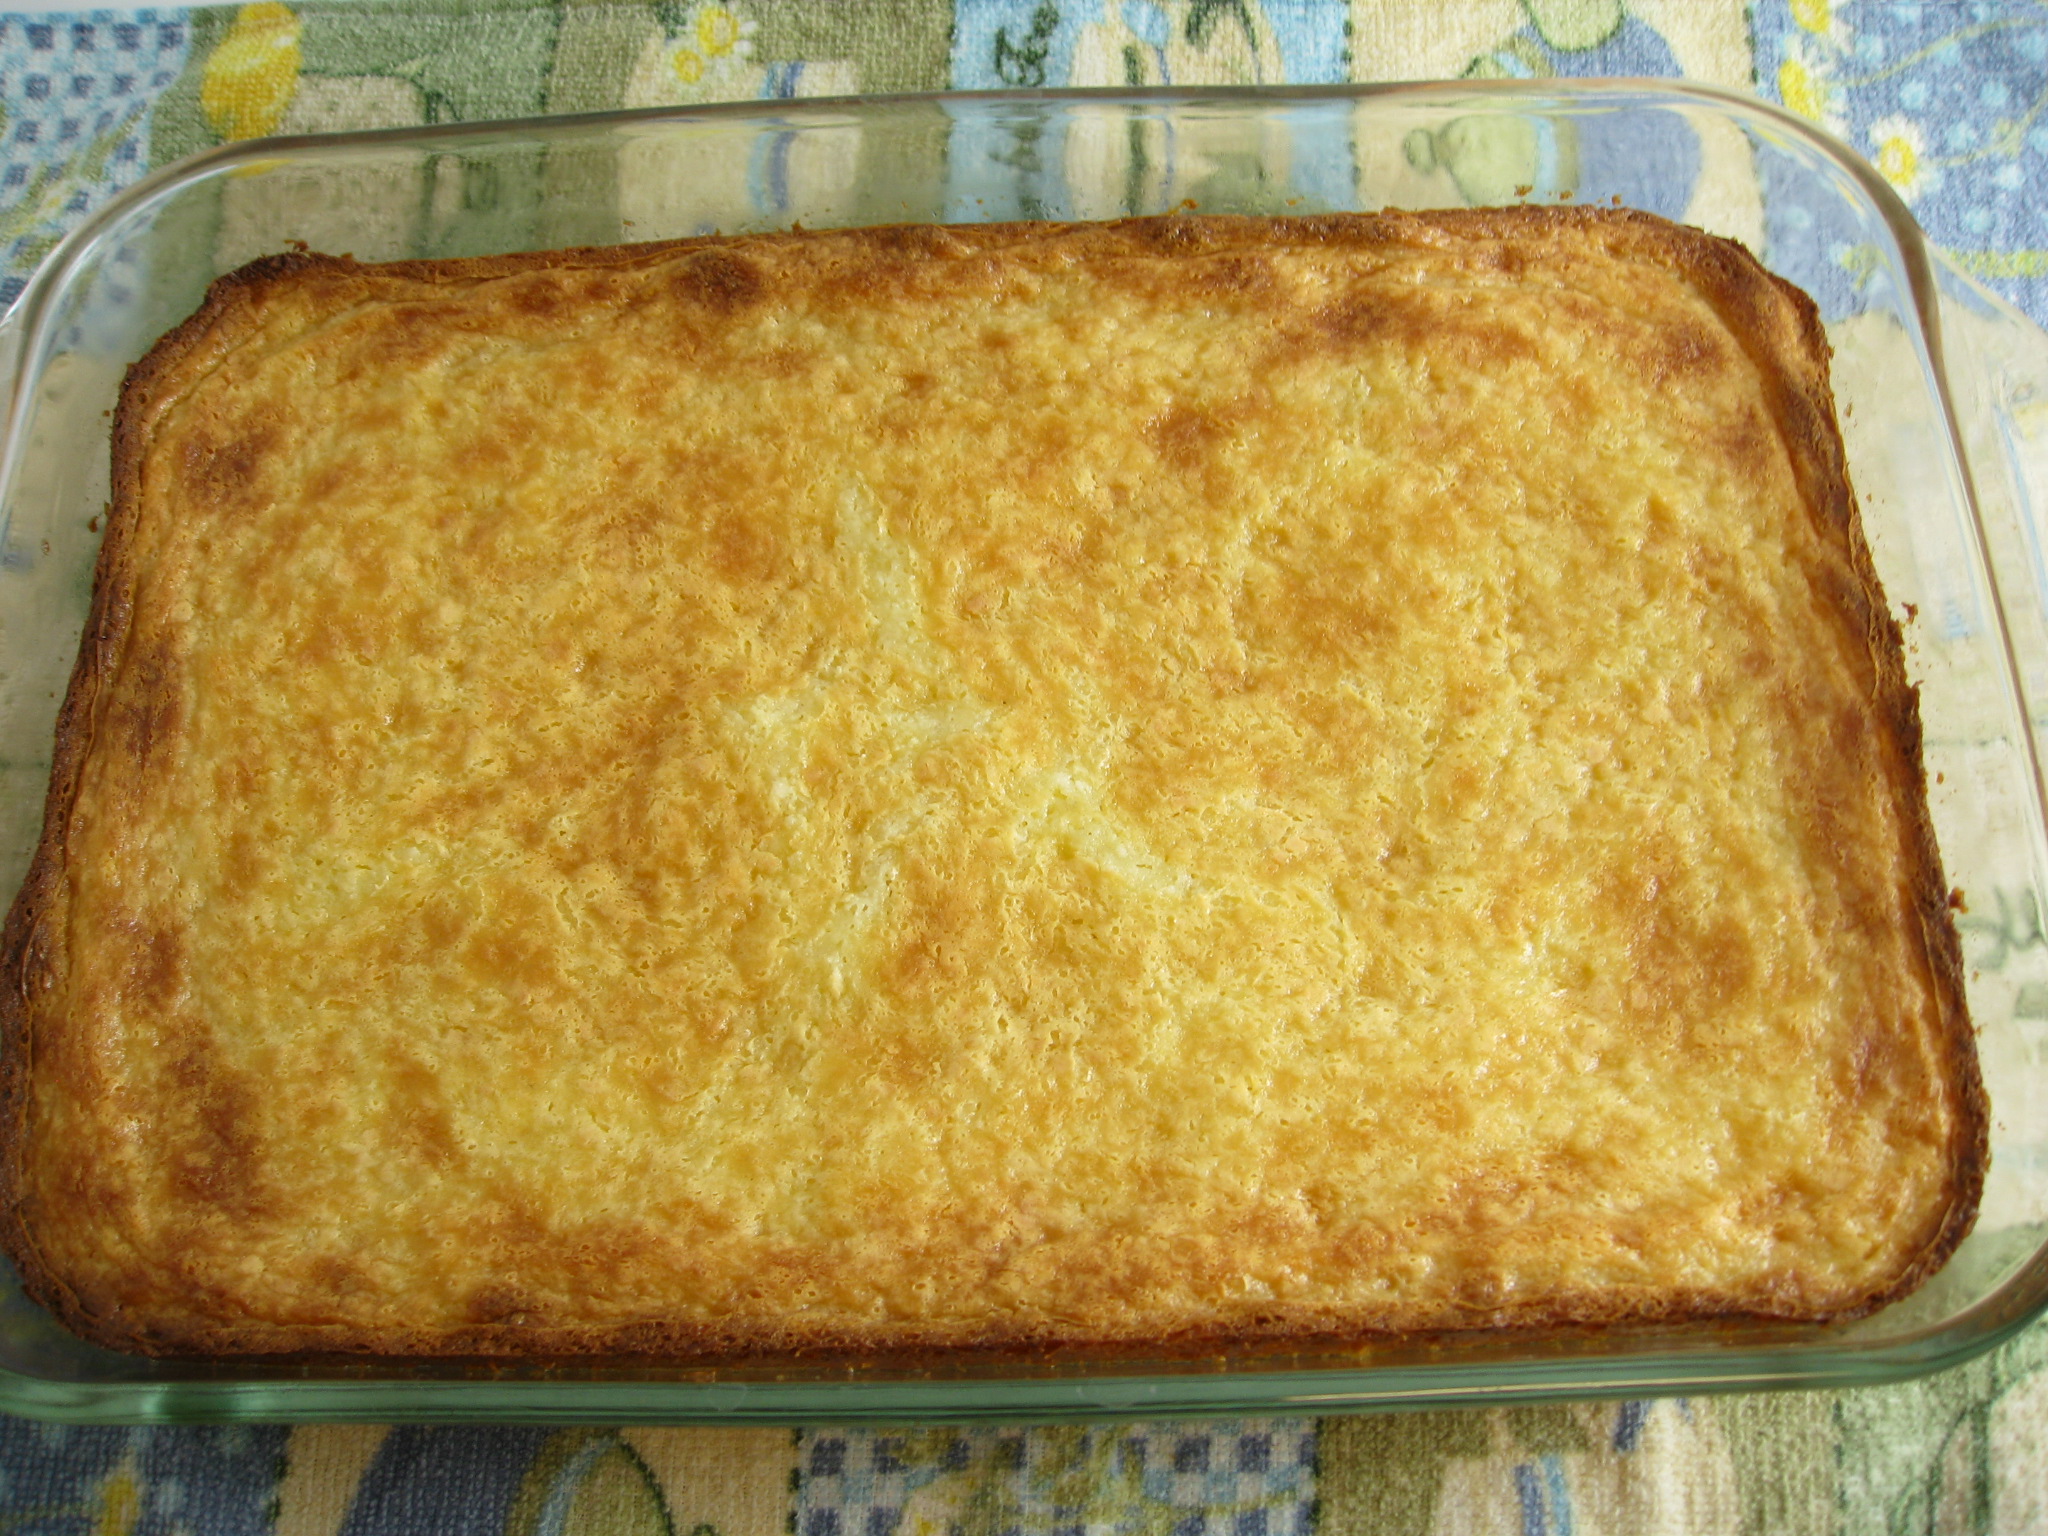
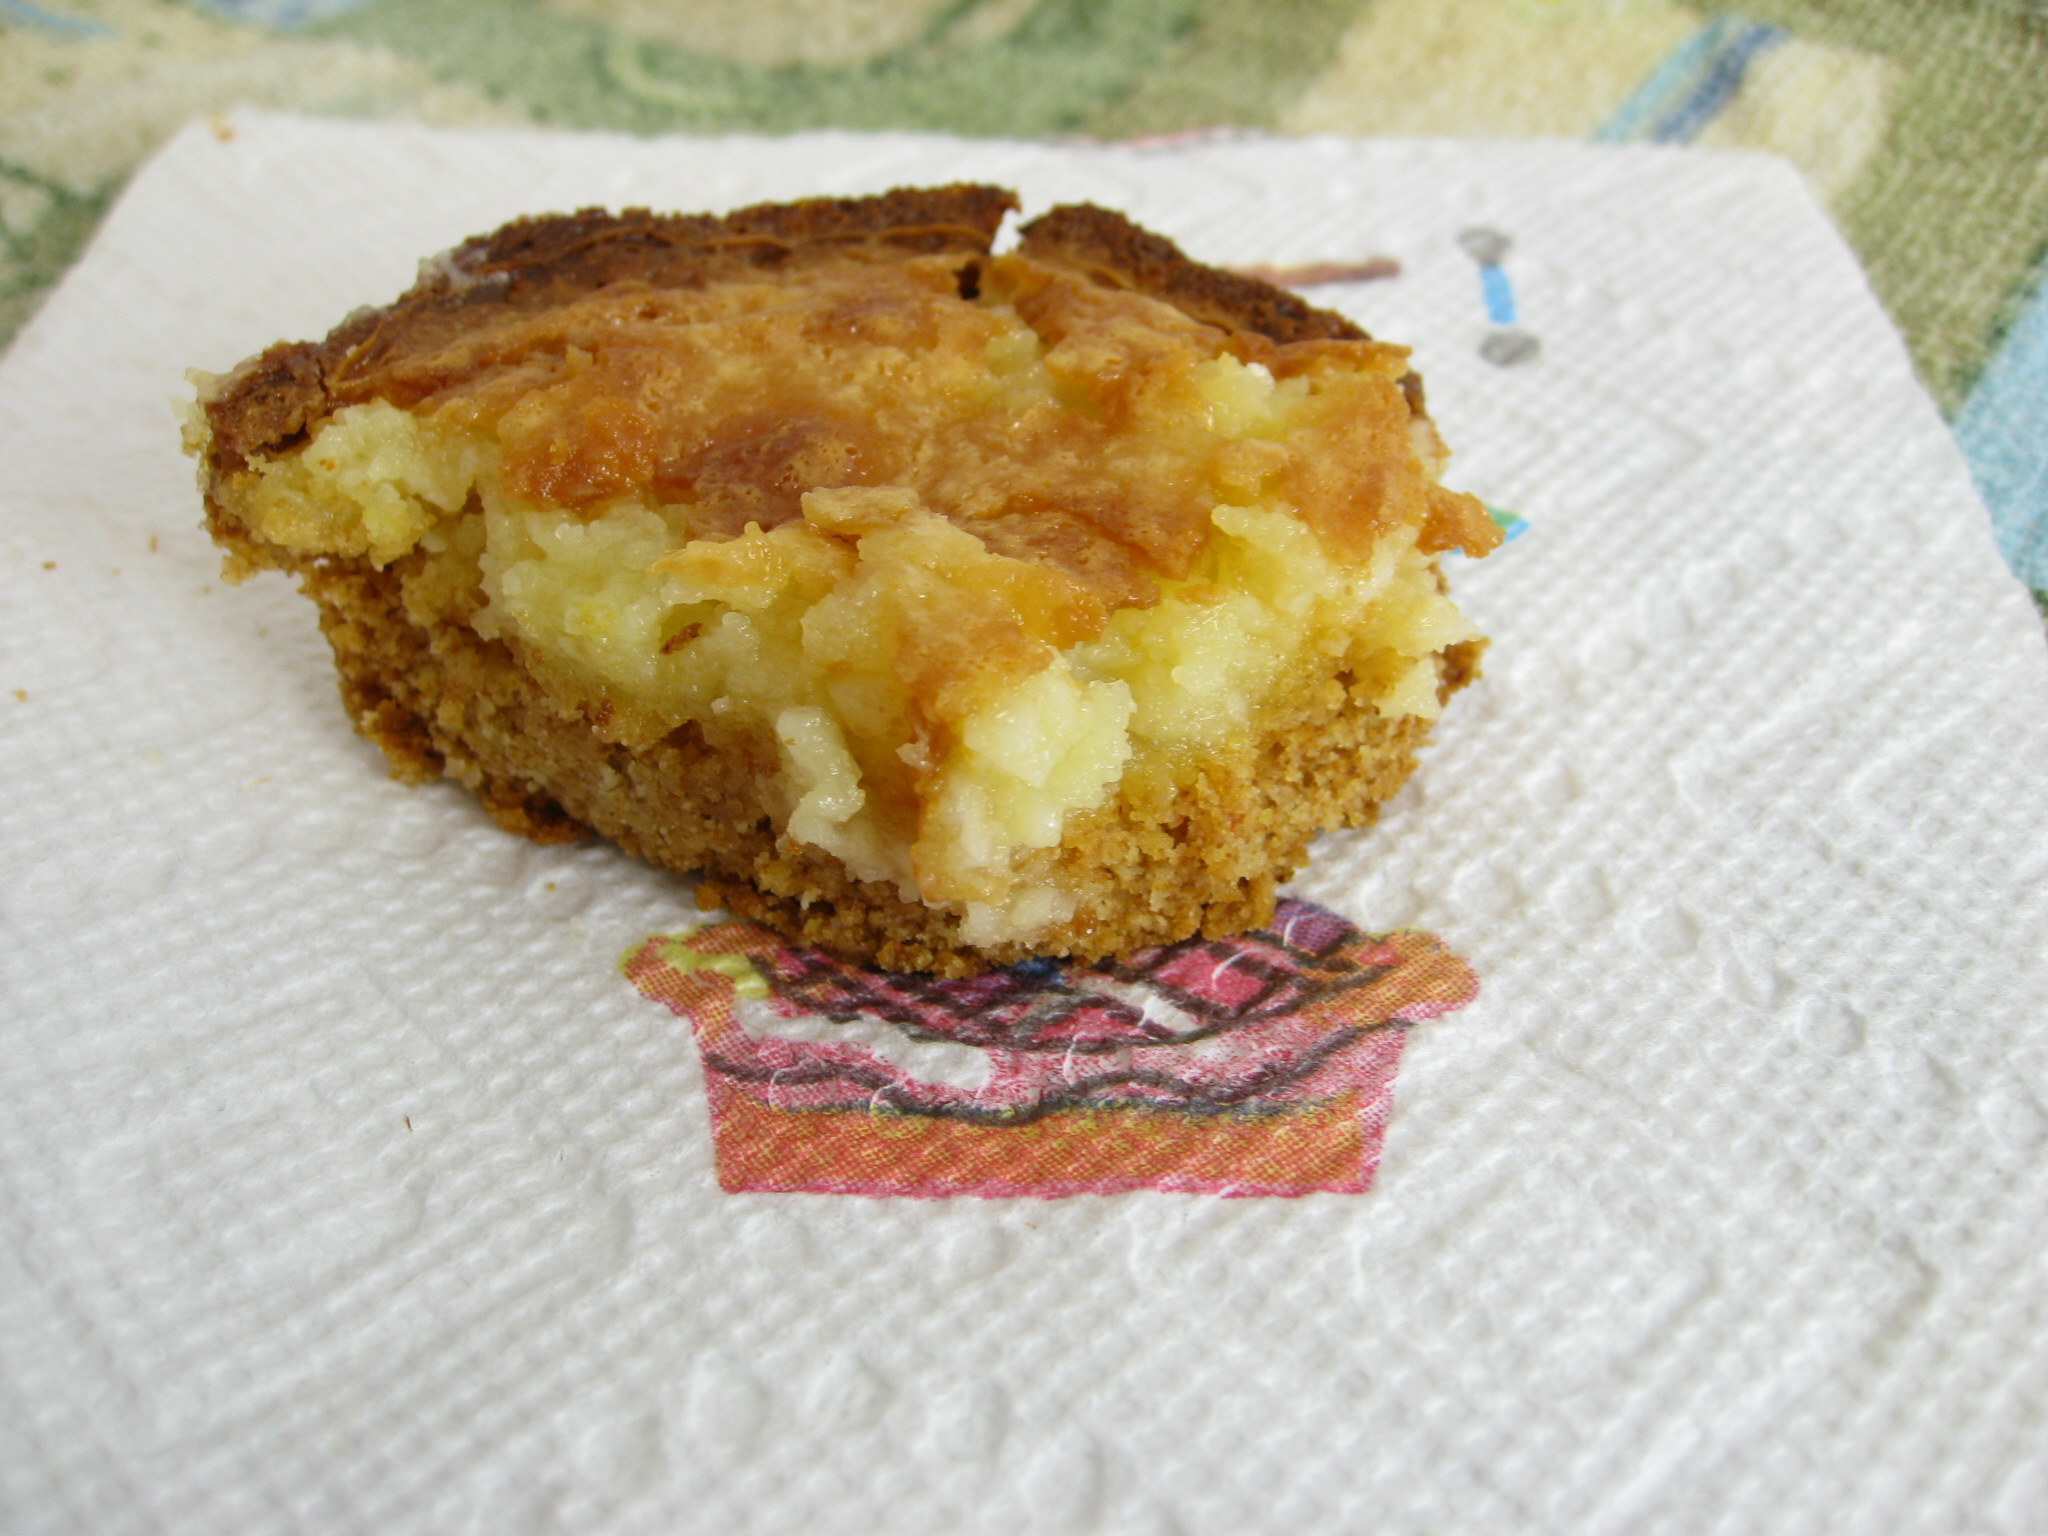
… and Cheesecake Candy Bar Brownies!Cheesecake Candy Bar Brownie

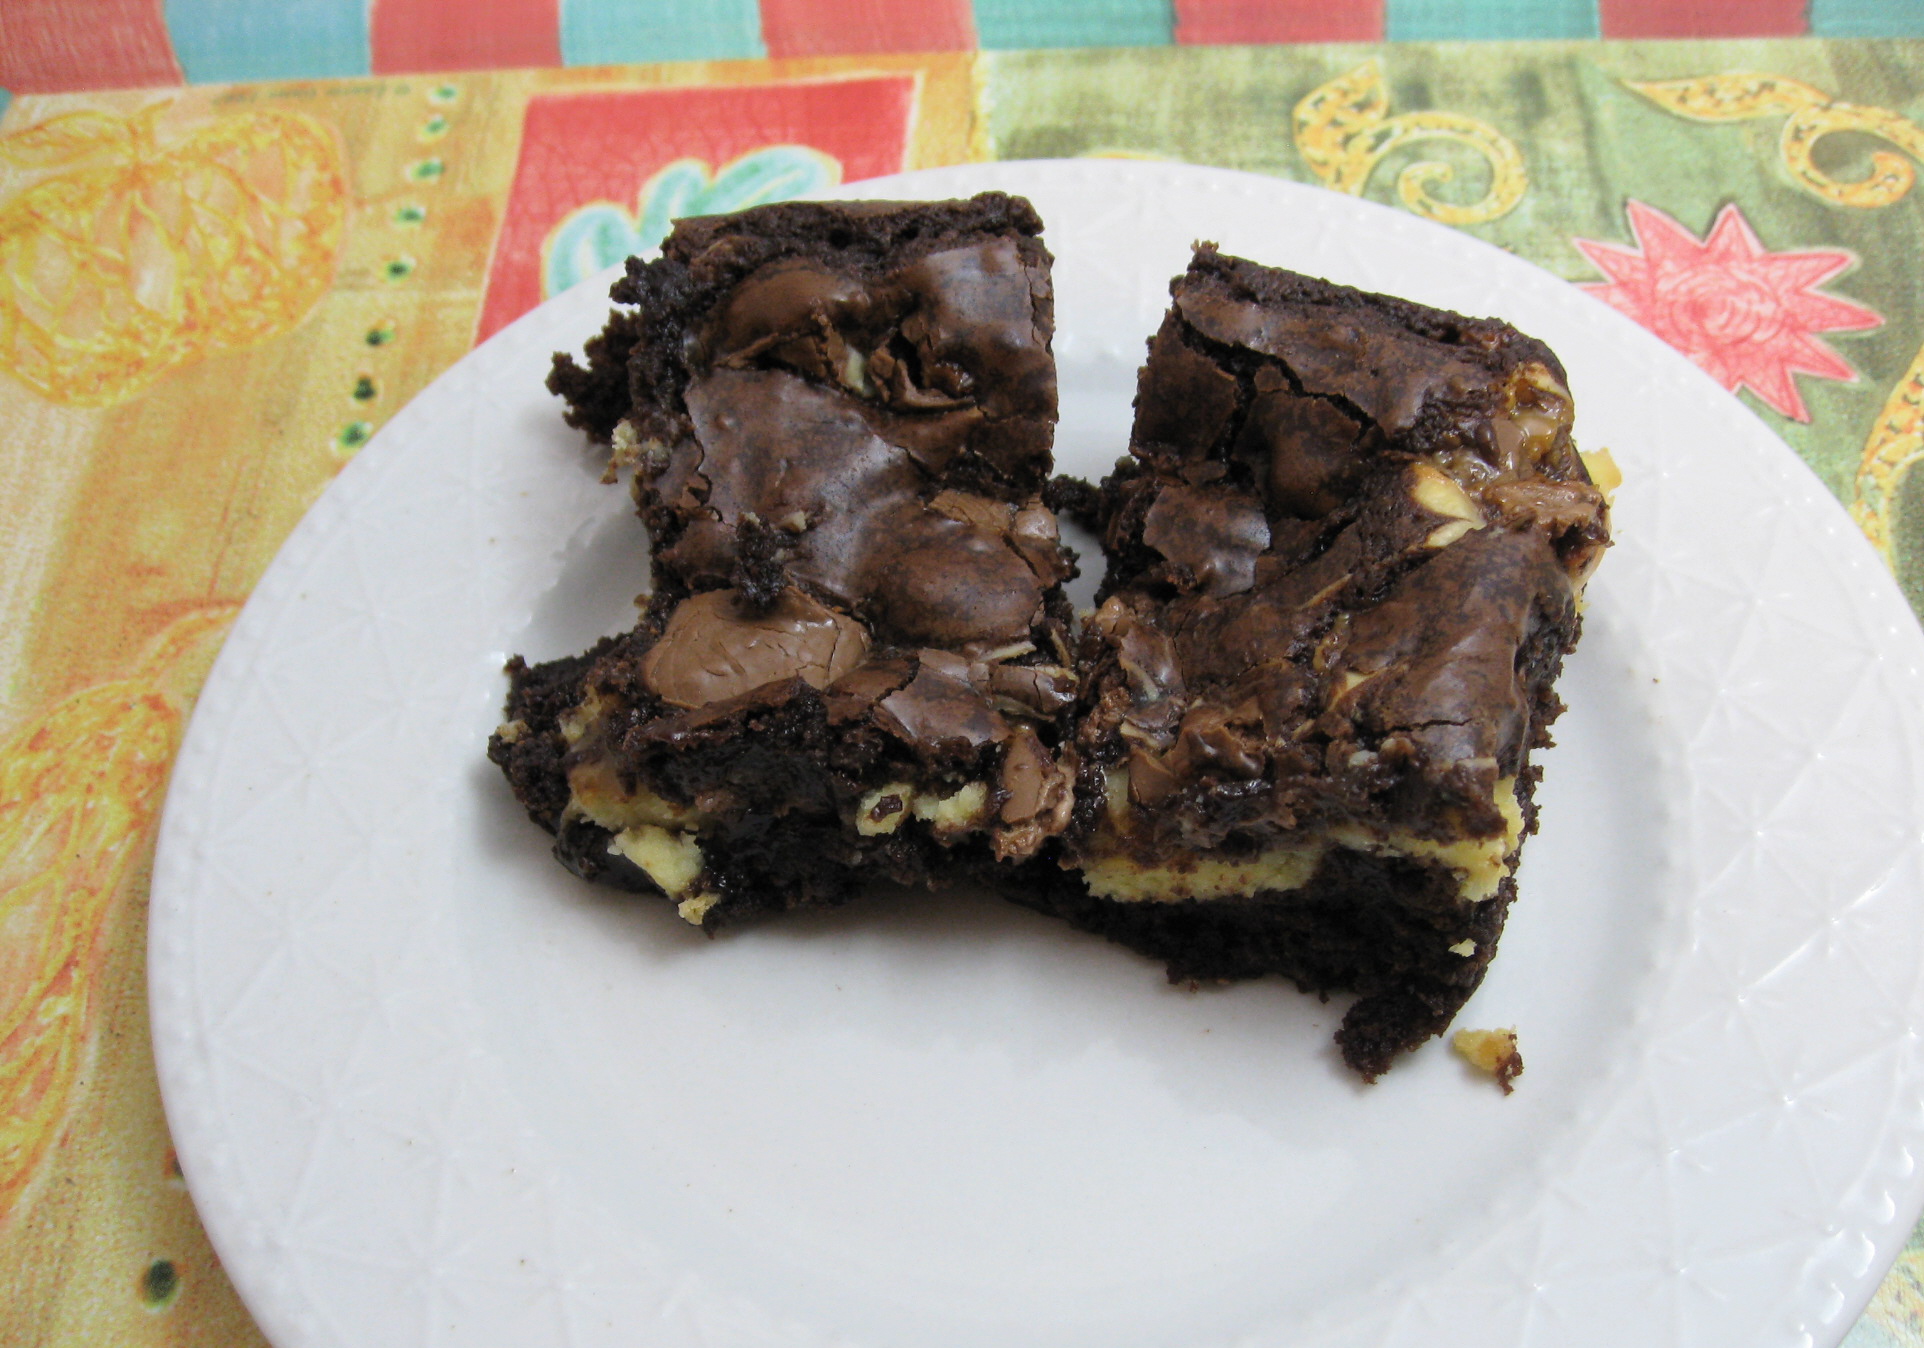
Since this was a last minute BBQ and I wanted to make something that would be quick and easy. I cheated a little and used boxed brownies as the base for both recipes.  However, I did use the mix that includes a packet of chocolate sauce which gets added to the batter. I think this helps a bit.

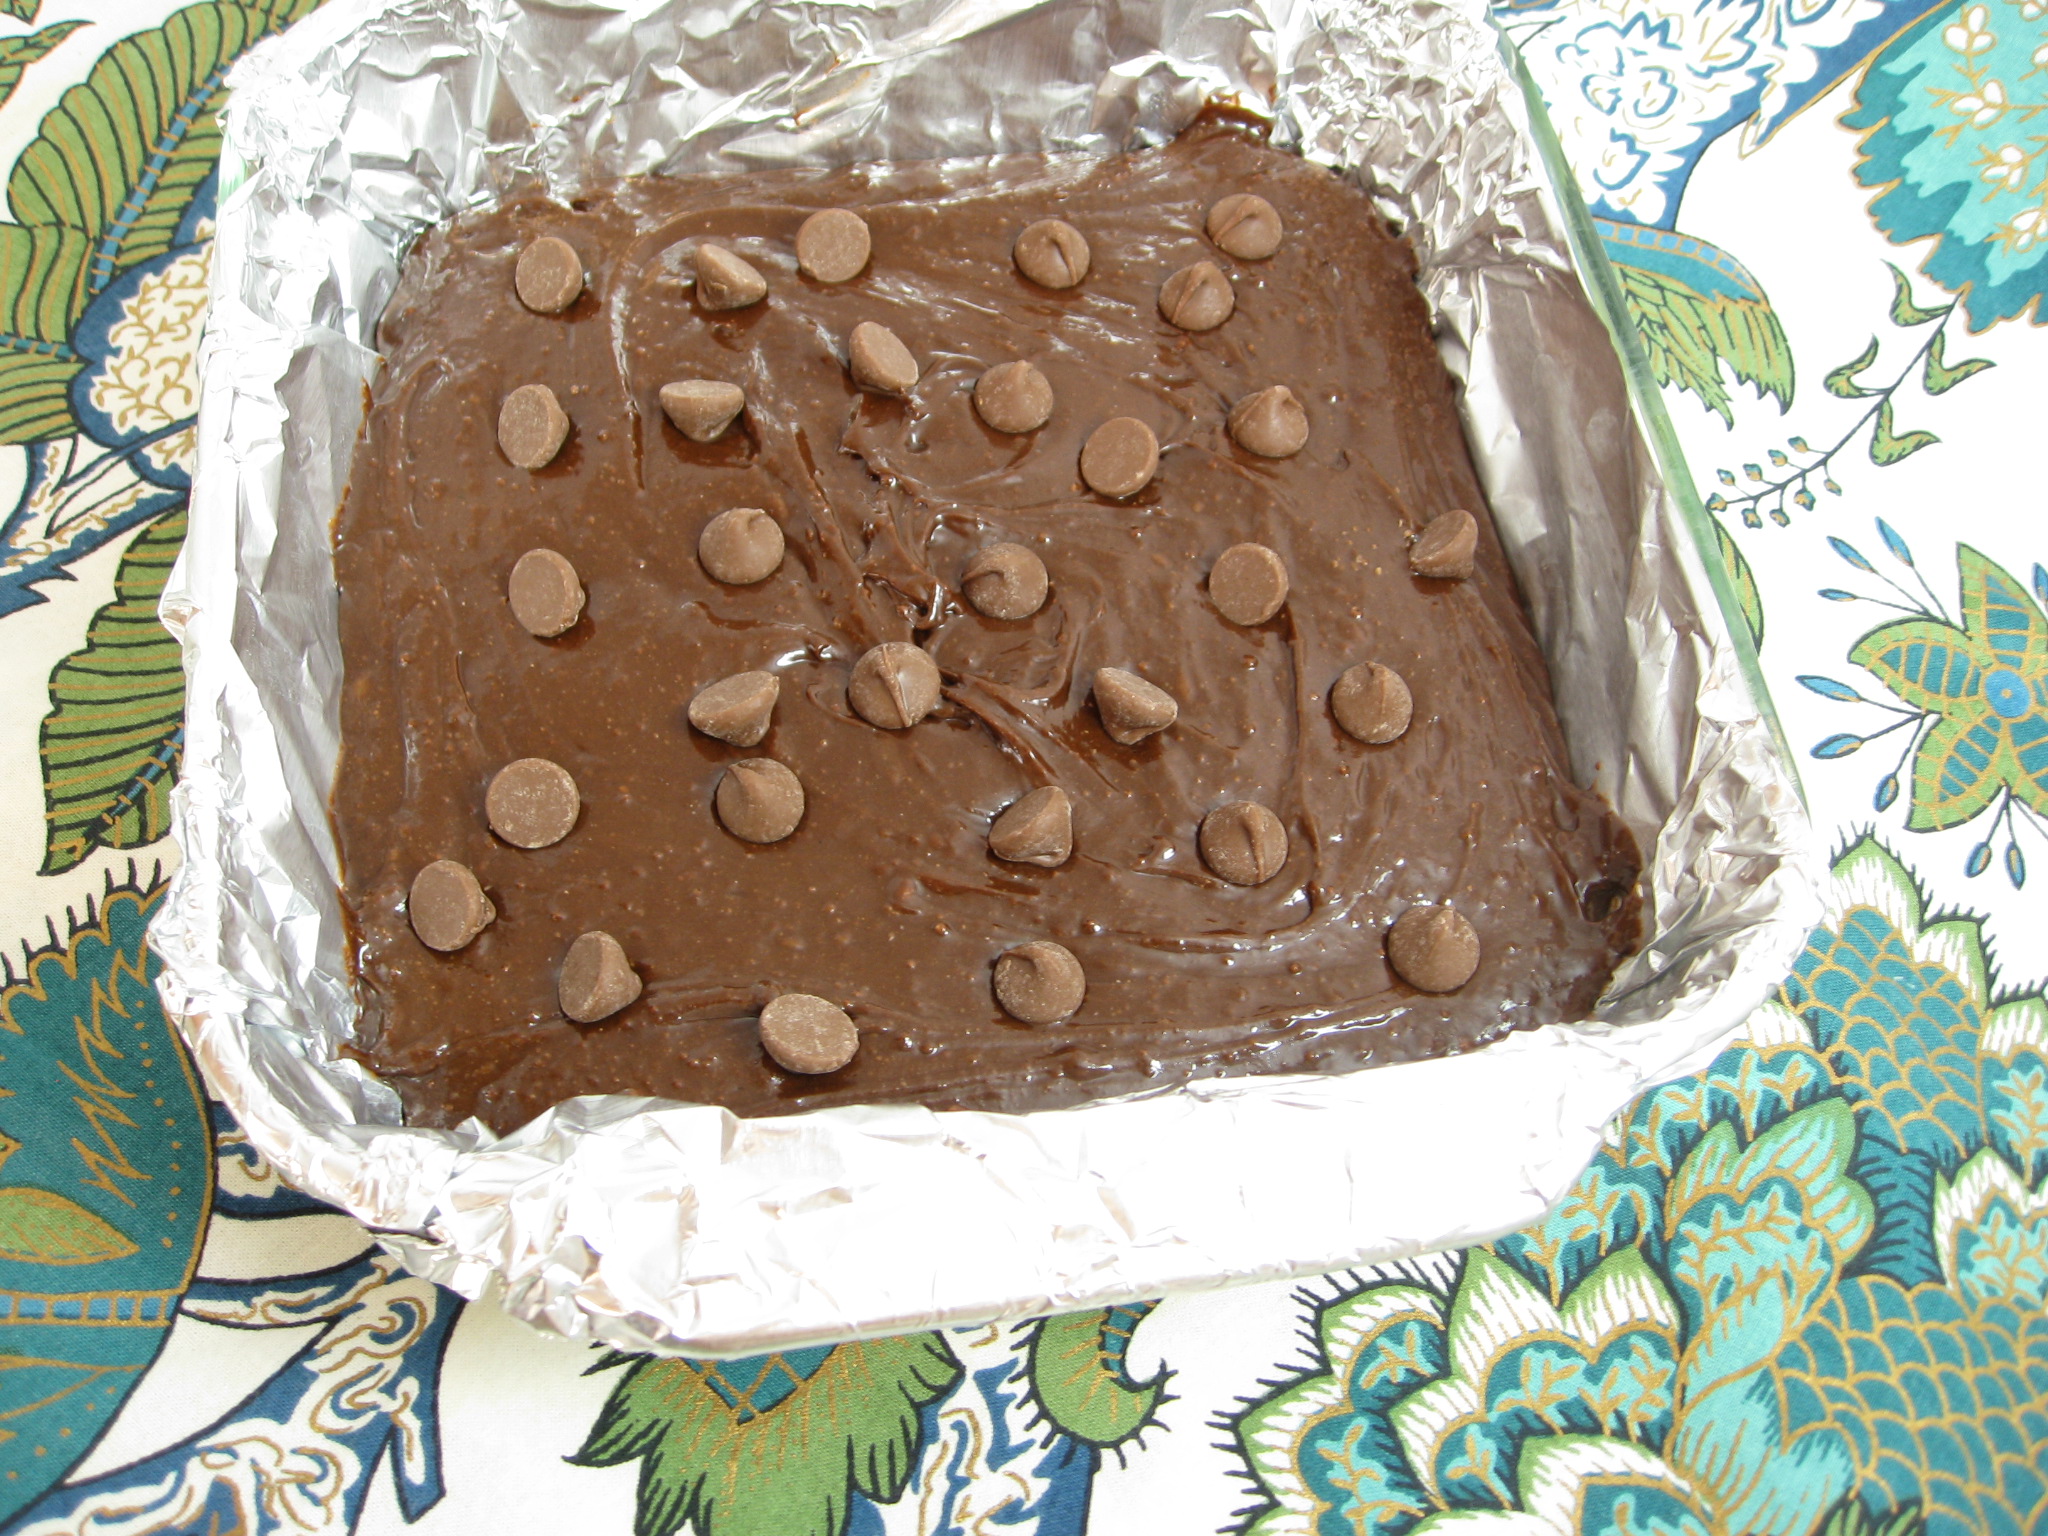
The Marshmallow Fluff Brownies are definitely the quicker and easier of the two recipes.  To help give them an extra boost of chocolate I sprinkled semi-sweet chips on top of the batter before baking. **Tip – use more chips next time. 🙂 **

IMG_2577 The marshmallow fluff was a little tricky, because it’s so sticky, but don’t be afraid to plop it on and then use a spatula dipped in warm water to help spread. For the chocolate drizzle I kept it simple and just melted chocolate frosting.  It was easy and set up nicely. IMG_2600
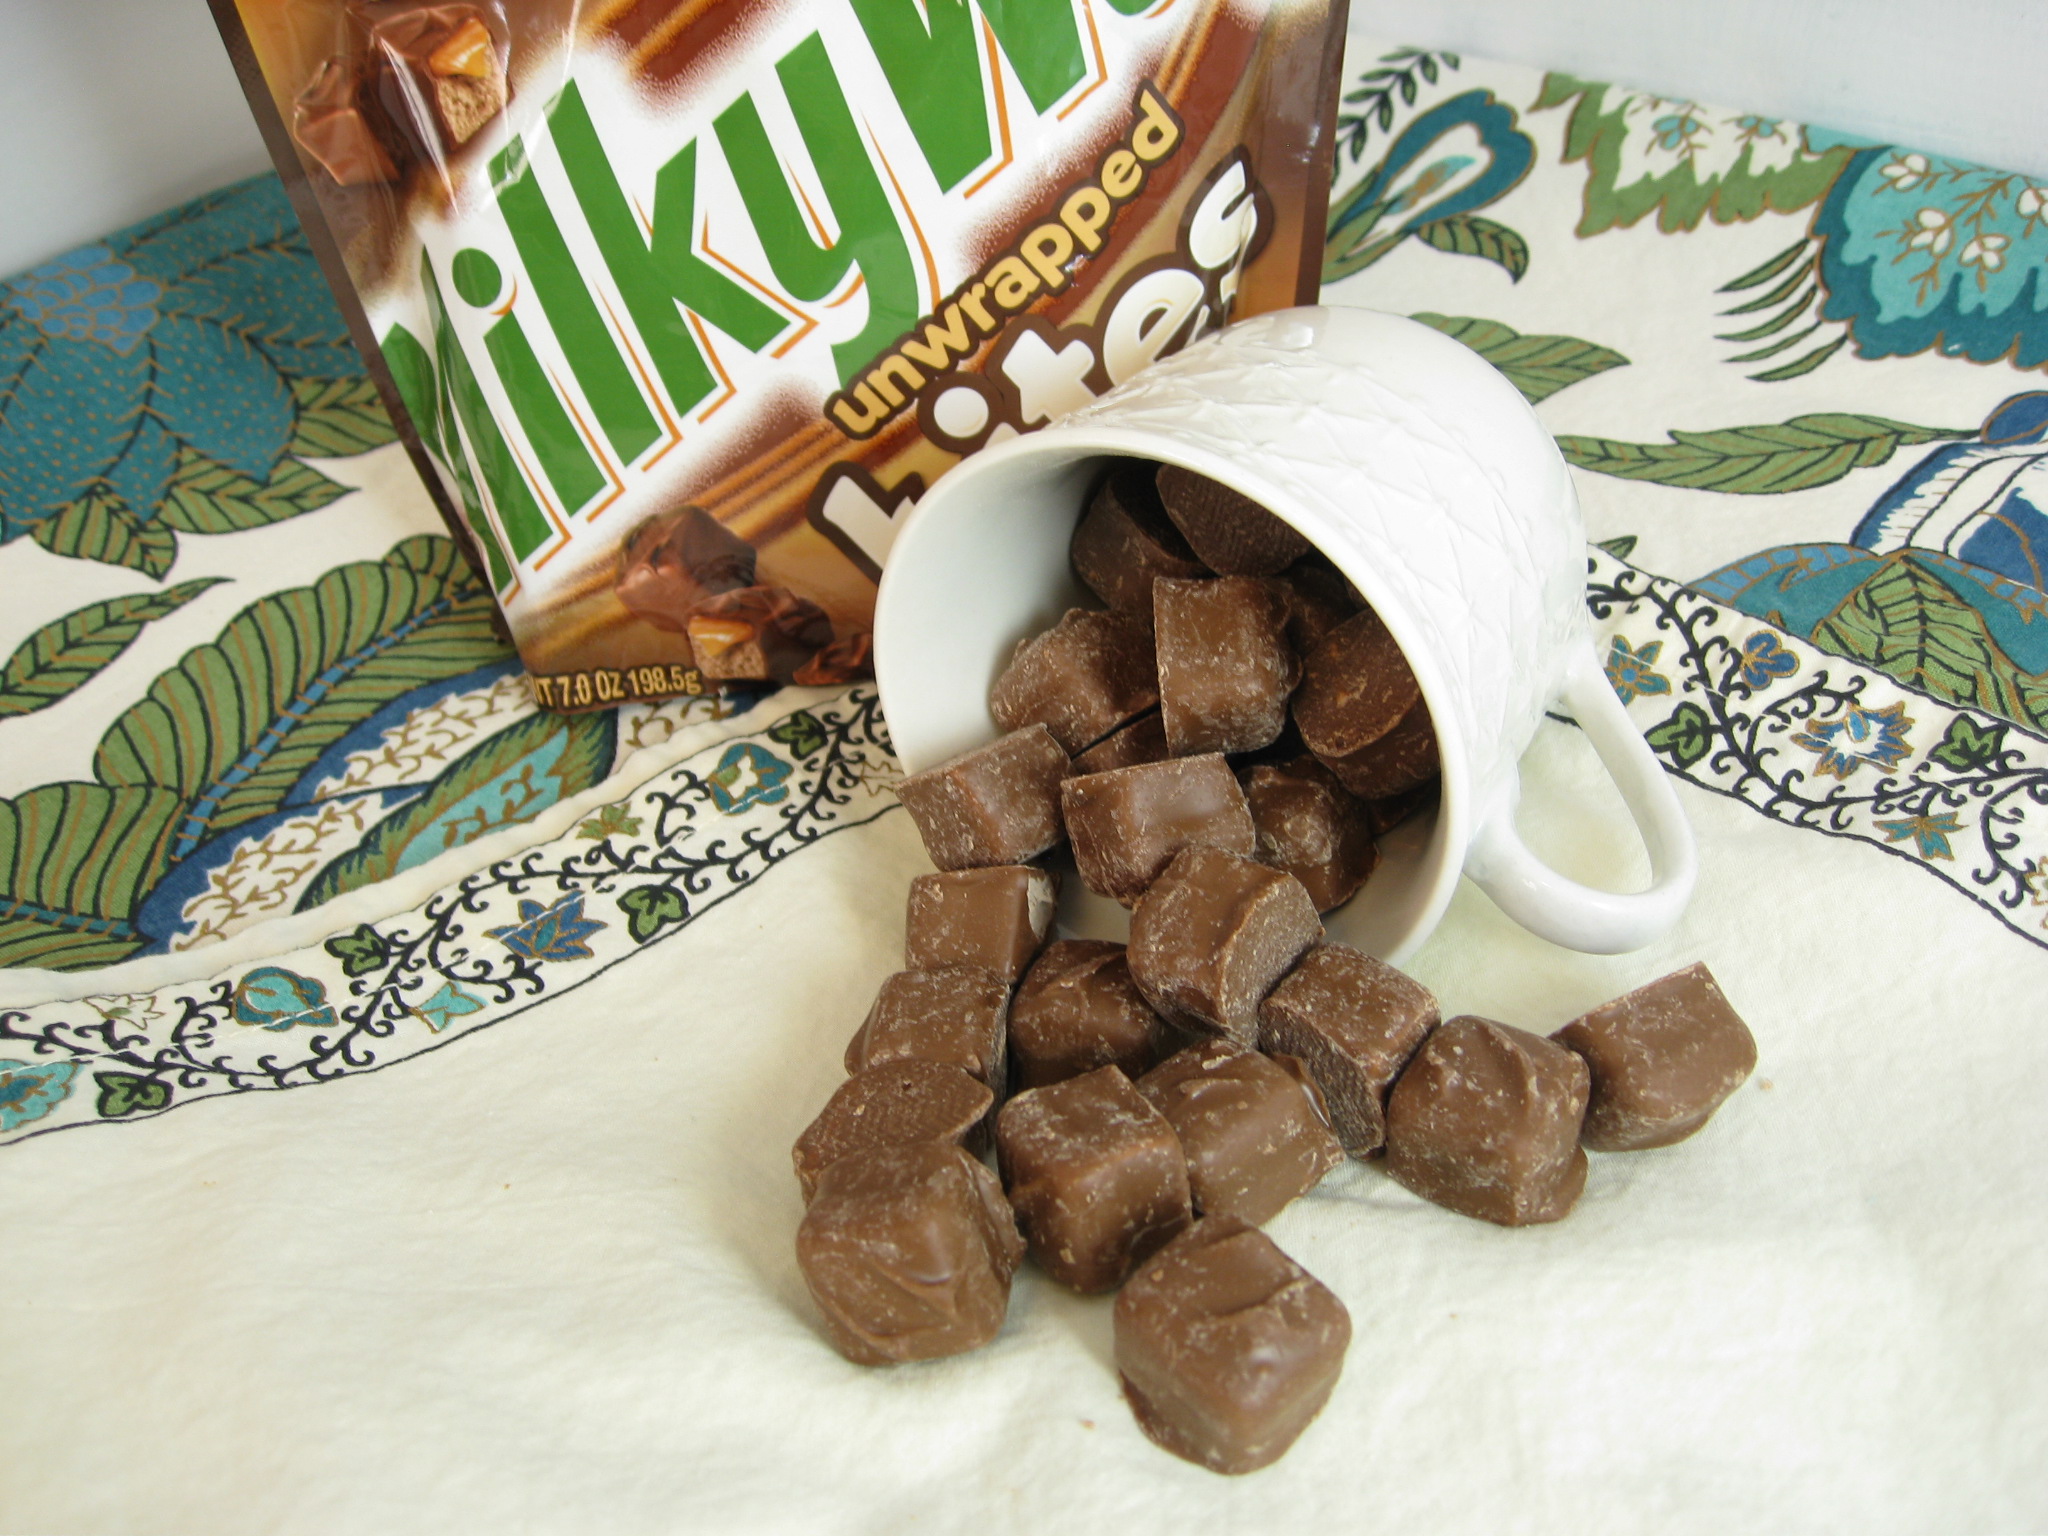
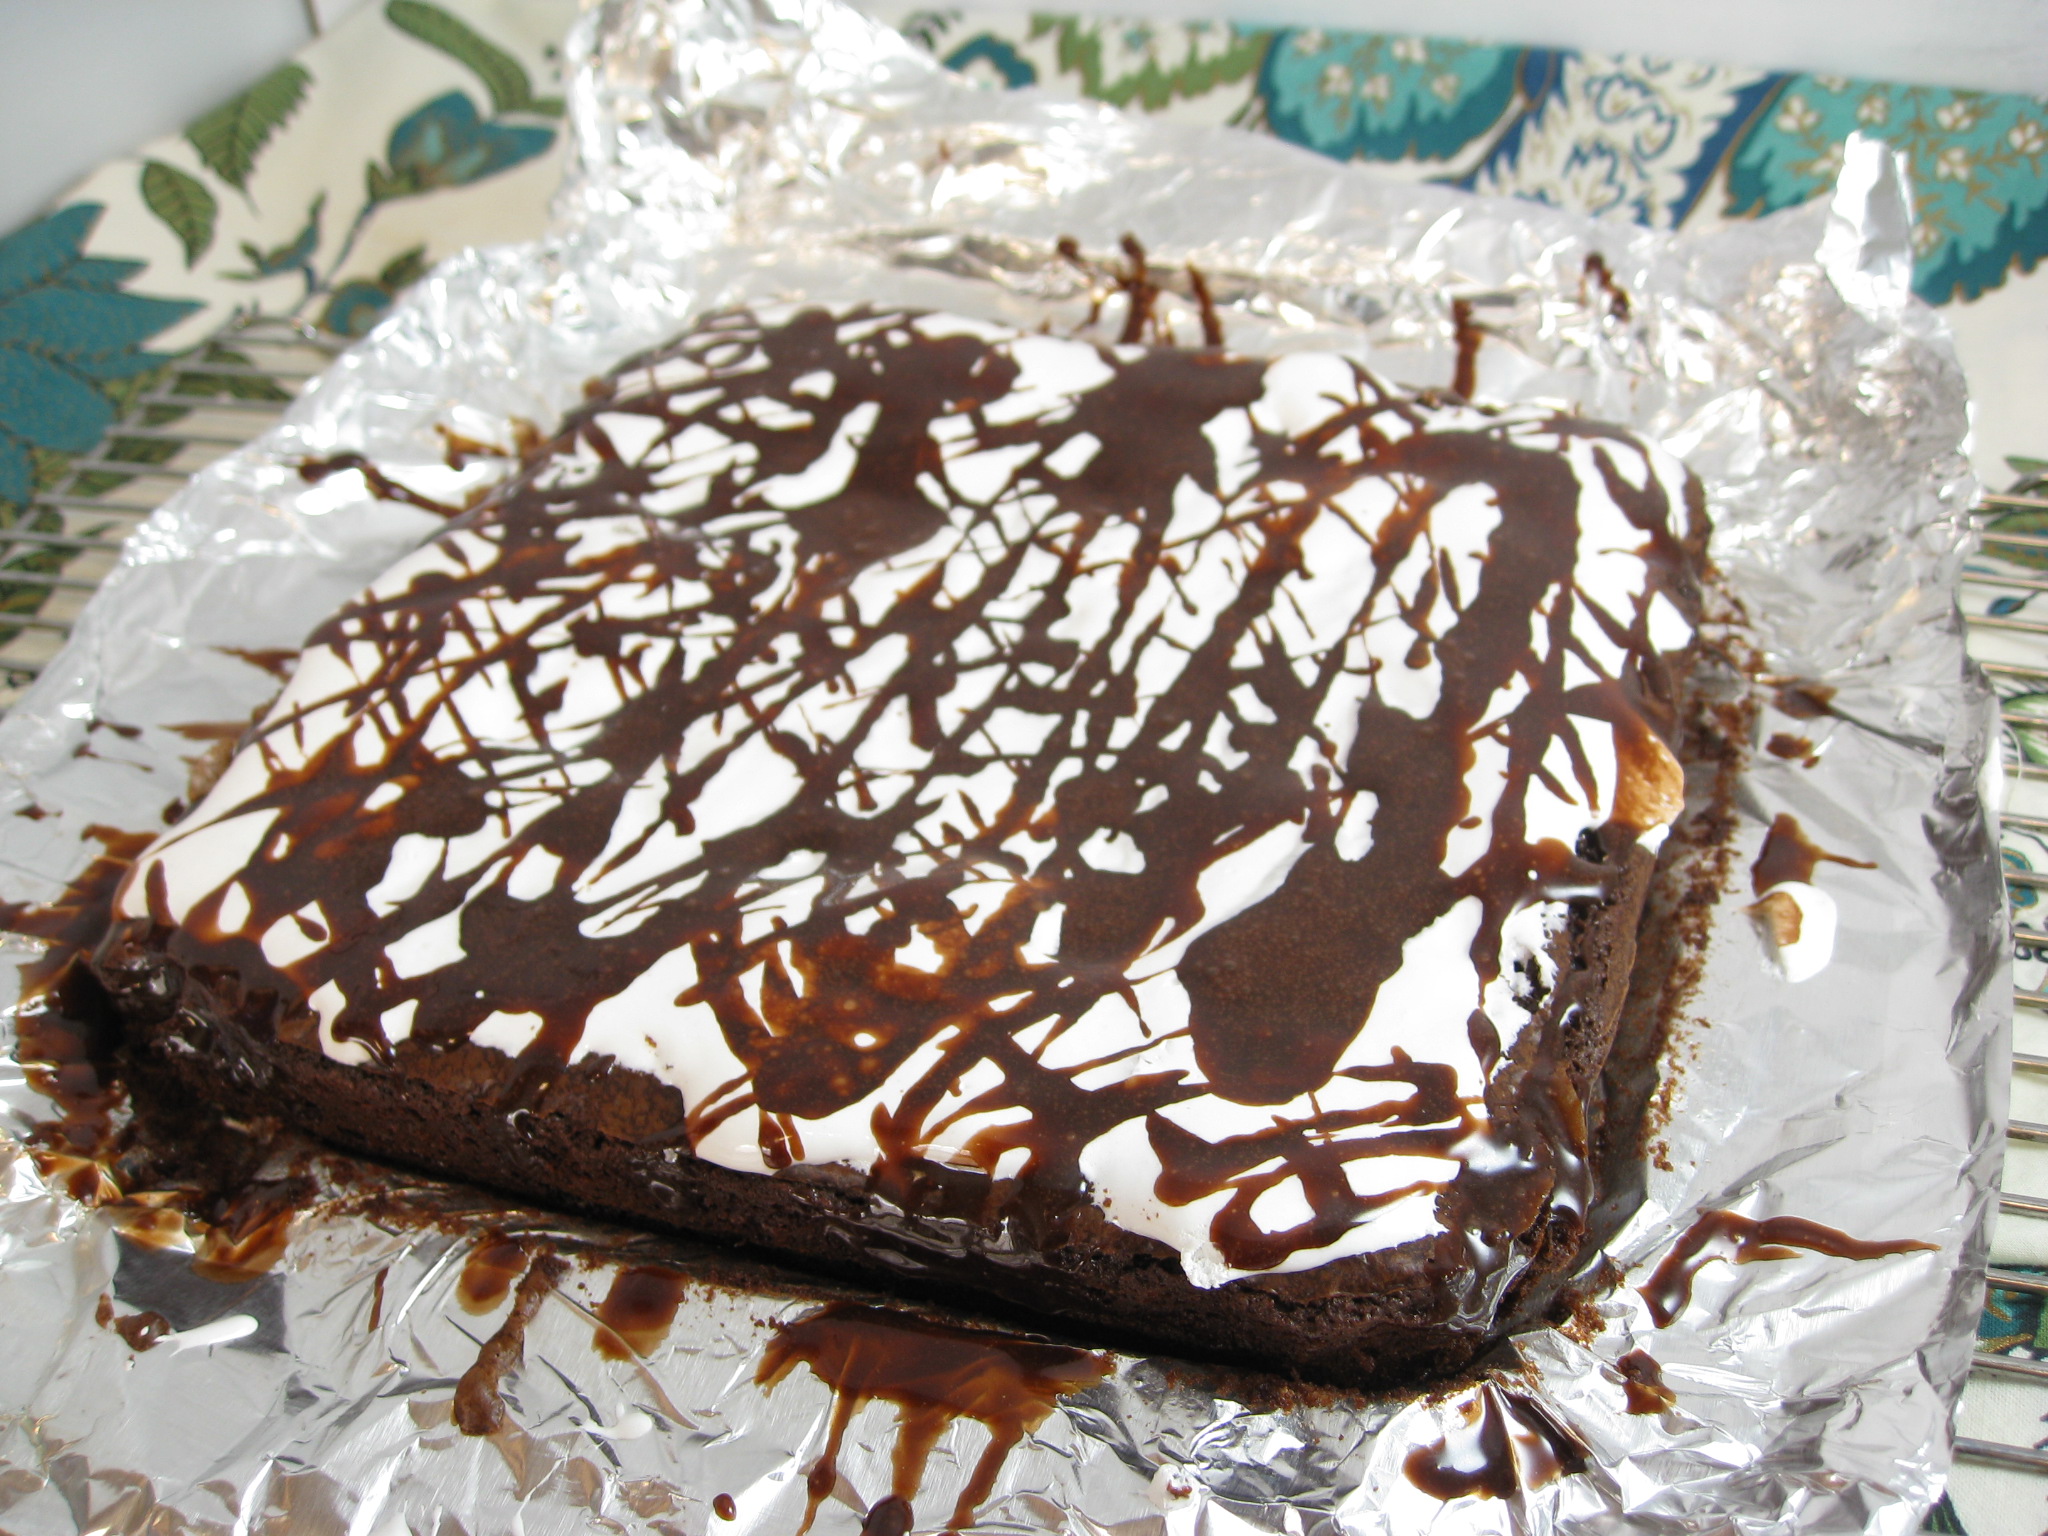
For the candy bar part of the Cheesecake Candy Bar Brownies I really wanted something with a little bit of caramel and nougat, so I went with Milky Way, but I think almost any kind would be good.  By the way I love that you can get them unwrapped and bite size – though it does make snacking on them a bit too easy. 🙂

IMG_2588

Unlike the first recipe, where you bake the brownies first and then add the toppings, with this one you layer batter, cheesecake and chopped candy bites and then bake.

Also, Mr. E strongly suggests that you eat the Cheesecake Candy Bar Brownies warm and serve with vanilla ice cream… he is pretty spot on with that recommendation.

Marshmallow Fluff Brownies

1 box brownie mix & ingredients per box (I use Ghirardelli Chocolate Supreme)
½ jar of Marshmallow Fluff
½ cup semi-sweet chocolate chips
½ chocolate frosting (I used store bought)

Preheat oven to 350°.  Line a 9×9 baking dish with foil and lightly grease.

Make brownie batter following the recipe on the box and pour into prepared baking dish.  Sprinkle the top with the semi-sweet chocolate chips.  Bake 30 to 40 minutes or until edges are set and a toothpick inserted in the center comes out with a few chocolate crumbs, but not raw batter.

While still warm spread the top of the baked brownies with the marshmallow fluff.  Place the frosting in a microwave safe cup. I used a glass measuring cup. Using the microwave melt the frosting, but don’t let boil.  For my microwave this was 10 seconds on high.  Then drizzle the chocolate over the top of the marshmallow fluff. 

Let cool completely before cutting.

Cheesecake Candy Bar Brownies

1 box brownie mix & ingredients per box (I use Ghirardelli Chocolate Supreme)
8 oz. cream cheese, softened
⅓ cup sugar
½ teaspoon vanilla
1 egg
1 to 1 ½ cups chopped candy bites (I used Milky Way, but Snickers or any of them would be good and I chopped them into quarters)

Preheat oven to 350°.  Line a 9×9 baking dish with foil.

Make brownie batter following the recipe on the box and set aside.  In a separate bowl using a hand mixer or using a stand mixer, blend the cream cheese until smooth.  Add the sugar, vanilla and egg.  Mix well.

Pour ¾ of the brownie mixture into the foil lined pan.  Carefully pour the cream cheese mixture over the brownie batter, using a spatula to spread it evenly and almost to the edges of the pan. Sprinkle the chopped candy evenly on top of the cream cheese mixture.

Drop spoonfuls of the reserved brownie batter scattered over the top.  Using a butter knife, gently drag the knife through the spoonfuls of batter, making swirls and combining the batter with the cream cheese mixture a bit.

Bake for 30 – 35 minutes.  Let cool completely before cutting.

Enjoy!

Blueberry Lemon Coffee Cake

Tags

, , , , , , ,

Blueberries are one of my favorite fruits; I love them in yogurt, in all kinds of baked items and of course plain. Because of my love of blueberries, I often buy them too early in the season and too late, meaning I often end up with a pint of not the sweetest or most flavorful ones.

Recently I ended up with one of these sad, unripe pints and was trying to decide what to make, when I remembered that I had sour cream that also needed to be used… So I asked Mr. E what he thought of coffee cake and he said he couldn’t remember what that tasted like (yeah right 🙂 ).

Blueberry Lemon Coffee Cake

It’s been awhile since I made a coffee cake and with our upcoming trip to Wisconsin, I knew I wanted to make enough for two cakes so that I could freeze one and take it on our trip. Mama J and Papa F always pick us up the best biscotti from their local Italian bakery, but I thought this time it would be nice to take them something homemade.

One thing I love about this batter is it has delicious hints of vanilla and lemon zest that really compliment the blueberries. The cinnamon streusel topping is extra yummy with the chopped pecans, but if you’re not a fan of nuts it would be just as good without.

Topping

One tip is to line each pan with foil and then greased the foil; I found this made the cakes easy to remove from the pan after baking.

The coffee cake was a big hit with the family and thawed perfectly!

Blueberry Lemon Coffee Cake

Yields two 8 inch rounds

Batter:
¾ cup butter, room temperature
1 cup sugar
2 eggs
1 cup sour cream
1 teaspoon vanilla extract
1 teaspoon lemon zest
2 cups flour
1 teaspoon baking powder
½ teaspoon baking soda
½ teaspoon salt
1 cup fresh blueberries, rinsed
 
Topping:
¾ cup flour
6 tablespoons brown sugar
4 tablespoons white sugar
1 ½ teaspoons ground cinnamon
4 tablespoons melted butter
½ cup pecans, roughly chopped
 
Preheat oven to 350°. Optional step is to line the baking dishes with foil and then grease; I found this to help with removing the cakes after baking. If you don’t want to waste the foil then just grease each baking dish.
 
In a mixing bowl blend butter and sugar until smooth and fluffy. Add eggs one at a time mixing well after each addition. Add sour cream, vanilla and lemon zest and mix until thoroughly combined.  In a separate bowl, mix flour, baking powder, baking soda, and salt. Add flour mixture to butter mixture a 1/3 at a time mixing well after each addition.  Gently fold in the blueberries.
 
To prepare the topping – in separate bowl mix flour, brown sugar, white sugar and cinnamon. Add melted butter and mix until combined. Then add chopped pecans.
 
Divide the batter in half and pour into each of the prepared pans. Divide the topping in half and sprinkle on top of the batter; lightly pressing down.
 
Bake 45-50 minutes until toothpick inserted into the cake comes out almost clean.  Remember, there will be some crumbs if you insert the toothpick through a blueberry.
 
Enjoy!


Lemon Gooey Bars

Tags

, , , ,

Super delicious, super addictive and super sweet!  These bars are absolutely amazing and are perfect for the sweet tooth in your family and doubly perfect if that person likes lemon.

Lemons

I wish I could say that I used the lemons from our lemon tree to make this (and so does Mr. E in order to justify the trees existence), but our citrus trees (we have four of them – all different) can’t decide from year to year if they want to produce fruit and how much.  So, I usually end up waiting till lemons are a good price and then make a couple of batches to share with friends and co-workers.  You’d think living in AZ that lemons would always be a good price and they’d be giving them away, but not so much…

IMG_2534

Technically you should let it cool a bit before cutting into bars and eating because it’s so hot – think molten lava hot, however, Mr.  E is not one to follow the rules and so he dug in with a spoon as soon as they were out of the oven…  I knew it must be pretty good because after he hopped a bit from one foot to the other with his mouth open trying to fan (cool off) the lemon lava in his mouth.  He looked at me and said “totally worth it” and took another spoonful.  I don’t know when I’m going to start taking his advice on matters like this because the only thing better than lemon gooey bars is a spoonful of hot lemon gooey pudding mess.

Lemon Bar Slice

Gooey Lemon Bars

Crust:
1 yellow cake mix – pudding in the mix
½ cup butter, melted
1 egg
 
Filling:
¼ cup lemon juice
2 eggs
8 oz. of cream cheese, at room temperature
3 tablespoon butter, melted
3 ½ cup powdered sugar
1 to 1 ½ teaspoon lemon zest
 
Preheat oven to 350.
 
Crust:  In a medium bowl mix dry cake, melted butter and egg.  Mix well; the mixture will be thick.  Grease the bottom and sides of a 9×13 pan and press the mixture into the pan.  Set aside.
 
Filling: In a separate bowl, I used my electric mixer, beat cream cheese well until smooth.  Add eggs and melted butter and mix well until the eggs and butter are fully incorporated.  Add lemon juice and mix well.  At this point there may be some lumps; mix at a high speed to try and get most of the lumps out but it’s okay if you don’t get all of them.
 
Add the powder sugar 1 cup at a time and mix well after each addition.  Once all the powder sugar has been added, add the lemon zest and mix.
 
Pour the filling over the crust and bake for approximately 45 minutes or until the center just barely jiggles when shaken.  The edges, and even the center, will be a medium golden brown.
 
Remove from oven, let cool and cut into bars.  Cover and store in fridge.
 
Enjoy!

Oh So Good Biscotti

Tags

A few years ago Mr. E and I went up to visit his parents in Wisconsin and the morning after we got there they surprised us with a selection of delicious Italian cookies and biscotti they had picked up from a local bakery.  That morning we sat in front of their big kitchen window, dunked the cookies and biscotti in our coffee and watched the wildlife in their back yard.  This has become a loved tradition and every time we visit them they have biscotti for us to enjoy in the mornings with our coffee.

IMG_2351

Wanting to continue the tradition down here when they visit, but not having much luck finding a convenient bakery with good biscotti, I took to making my own.  I tried a few different recipes and found that I like biscotti that are crunchy but not super hard.  This recipe makes biscotti that are perfect for dunking, but not so crunchy that if you want a mid-afternoon snack they are too hard to eat alone.

This is quite an easy recipe but allow yourself some time to make these because prepping some of the ingredients may take longer than you think. (Halfway through I’m usually like “oh my gosh, I’m still not done” LOL, but I do make double batches because they get eaten quickly!)

IMG_2336

One of the trickier steps is shaping the dough into logs because it is very sticky.  I’ve found that if I drop the dough onto the baking sheet in somewhat of a log shape, then keep my fingertips a little wet, it’s easier.

IMG_2341

After baking the biscotti logs, they need to cool a little bit before slicing. I made the mistake once of letting them cool too long and had a crumbly mess when I tried cutting them. I was of course completely disappointed, however, Mr. E didn’t mind because he just sprinkled the crumbs on top of ice cream and made “mmmmmm” sounds. LOL  I have the most luck cutting the biscotti when I use a long, straight edged knife and press straight down as opposed to trying to cut with a serrated knife.

IMG_2343

There are so many variations that can be made using this base recipe.  I’ve included just a few that are my favorite, but I hope that you will experiment as well!

On a side note, one of the ingredients listed below is Black Cherry Flavor candy oil.  I’ve purchased a few candy oils and flavor extracts through LorAnn Oils http://lorannoils.com/ and have been really happy with the flavor and quality.  I prefer the Black Cherry flavor to the regular Cherry flavor they sell, surprisingly there is a difference.

Biscotti Base

¼ cup light olive oil
¾ cup white sugar
2 eggs
1¾ cup flour
¼ teaspoon salt
1 teaspoon baking powder
 

Cranberry, Apricot and Pistachio

2 teaspoons vanilla extract
½ teaspoon almond extract
¾ cup slightly chopped pistachio
½ cup dried cranberries
¼ cup dried apricots chopped
¼ teaspoon dried orange peel (or orange zest)
 

Black Cherry Chocolate chip

1½ teaspoon almond extract
¾ teaspoon black cherry flavoring (candy oil)
¼ teaspoon orange peel or zest
5 tablespoons semi sweet mini topping morsels
 

Chocolate Chip Almond

2 teaspoons almond extract
¼ teaspoons vanilla
¼ teaspoon orange peel or zest
½ cup slivered almonds
5 tablespoons semi sweet mini topping morsels
 
Preheat oven to 300.  In a large bowl mix together oil and sugar until well blended.  Depending on which variety of biscotti, add the extracts, flavoring and/or orange peel, accordingly; mix well.  Add eggs and mix well.  In a separate bowl mix flour, salt and baking powder.  Gradually add the flour mixture to the egg mixture; mixing well after each addition.  Add any fruit, nuts and/or chocolate chips if using and mix by hand.
 
On a cookie sheet that has been lined with parchment paper, divide dough in two parts and form into logs about 12×2 inches.  Dough may be sticky; lightly wet finger tips to help form the dough.
 
Bake for about 35 minutes or until the biscotti logs are lightly browned.  Remove the biscotti logs from the oven, place on a cutting board, cover with a kitchen towel and let cool about 10 minutes.  Using a large knife carefully slice the logs on a diagonal, about 1/2 to 3/4 inch wide.  Lay the slices back on the parchment paper lined cookie sheet, sliced side down and bake an additional 8-10 minutes on each side until lightly browned and dried out a bit.
 
Enjoy!

Throwback Curry Chicken Casserole

Tags

, , , , ,

If you’re looking for a curry chicken recipe to pair with naan bread and basmati rice…this isn’t it.  (The word ‘casserole’ alone should be an indication).  🙂 This dish is a throwback to the early 80’s (maybe even earlier) that my mom used to make often when I was growing up. It is from a time when a bit of curry spice was exotic and adventurous to some of us.  While cooking this the other night I laughed thinking how just in the last few weeks we’ve cooked dishes that not only include curry but also garam masala, turmeric, coriander and saffron…  How our tastes and skills have expanded!!

Throwback Chicken Curry Casserole

This may not be a fancy or healthy dish and it is definitely an 80’s recipe, but I sure do crave it sometimes!  Even Mr. E who didn’t grow up on this dish loves it!  (Though he did grow up in the 80’s in Wisconsin and it does include cream of chicken soup in a casserole form…hmm. Just saying). Ha Ha.

The recipe is simple, the ingredients are few, and the skill level is super easy… no need for detailed preparation ‘tips’ or helpful pictures.   So for those late 30’s, early 40’s, casserole – canned cream of ‘somethin’ soup loving individuals… may this bring back good memories from your own casserole filled childhood!   To the rest of you – may the curry make it just fancy enough that you want to give it a try! 🙂

Curry Chicken Casserole

*This recipe can easily be doubled. We serve with steamed white rice
 
 2 chicken breasts cut into about 1 inch pieces
2 -3 cups broccoli florets, steamed
½ teaspoon lemon juice
¼ teaspoon ground curry, plus a dash
1 can cream of chicken soup
½ cup mayonnaise
1 cup grated sharp cheddar cheese
2 slices of white bread, toasted & cut into cubes “croutons”
Oil
 
Preheat oven to 350°. In a medium bowl add the cream of chicken soup, mayonnaise, lemon juice and curry; mix well.  Sprinkle chicken with a pinch of salt and pepper.  In a skillet heat approximately 1-2 tablespoons of oil over medium heat.  Add chicken pieces to the pan, you may want to divide into two batches, and cook thoroughly.
 
In a 9×9 pan layer the cooked chicken pieces, then the steamed broccoli florets; spread the cream of chicken soup mixture over the broccoli; then sprinkle with the grated cheese and arrange the croutons on top.
 
Bake 35-45 minutes until it bubbles a bit around the edges and the center is hot.  Serve with white rice.
 
Enjoy!  (while watching a great 80’s movie like Pretty in Pink!)

Grilled Pizza – Pulled Pork and Green Chile Sauce

Tags

, , , ,

We are having an unusually warm winter and are counting our lucky stars that we live in sunny AZ and not on the east coast or Midwest! Since it has been in the mid 70’s the last few weekends we have pulled out the pizza stone and are back to grilling pizzas. Yea!

A few years ago Mr. E got this great pizza stone that sits on a metal stand that then goes directly on the BBQ grill. He will turn the heat on the grill really high to get the stone super-hot. Then when he slides the pizza on the stone and closes the BBQ lid, it is so hot it makes an awesome crust and cooks really quick.

The part that makes this pizza super yummy is that it goes beyond the pepperoni, mushroom, veggie, pineapple and ham pizza. (Yes, I do believe pineapple and ham pizza can be good but only if you pick off and eat all the pineapple first, then give the ham to Mr. E or the dogs and just eat the cheese pizza by itself.)

Imagine with me…a pizza with a tomatillo green chile sauce, pulled smoked pork, jack cheese, and caramelized onions. A little different, yes, but super delish 🙂 (Mr. E is staring at me while I write this and I can hear him thinking: “Mmmmmm…pizza…beer…yummmm”.)

Pizza

Tomatillo green chile sauce is super easy to make and it freezes really well.   It’s also good on tacos, chicken enchiladas, pork stew or anything you want to give a little flair to.

I take a short cut and buy canned tomatillos and then use hand blender to puree them.

IMG_1530

The second key ingredient is roasted green chiles. If you can get freshly roasted chiles definitely use those.  I would not recommend purchasing the canned green chiles unless you have no choice. This is one of those ingredients that I really think makes a difference when cooking.  There is something about the canned roasted chiles that does affect a recipe and makes the results less good.  Roasting fresh chiles is not hard and they freeze really well if you wanted to do a bunch at a time.

While the sauce was cooking we thinly sliced some sweet onion (I only buy the sweet onions, they aren’t as bad as the yellow) and slowly cooked them in a pan with lots of butter, some salt and pepper until they were caramelized. We also shredded some already cooked pork and grated the jack cheese.  Once the sauce was done, we assembled the pizza (minus the onion) and brushed the edges with garlic butter. We added the caramelized onion at the very end because otherwise they burn to a crisp – we learned that the hard way.

IMG_1538

Green Chile Sauce

5 tomatillos
1 quart chicken broth
1¼ – 1½ lbs roasted green chiles, seeded, skin removed and chopped
2 teaspoons onion, minced
1 teaspoon Mexican oregano
1 garlic clove minced
Pinch of salt and pepper
2 tablespoons of cornstarch
2 tablespoons water
 
Puree the tomatillos using a blender or food processor.  Add the pureed tomatillos, chiles, onion, oregano, garlic, salt and pepper to a pot.  Bring to a boil over medium high heat and simmer for about 10 minutes.  Mix the cornstarch and water together in a small dish to make a slurry and then add to the pot; stirring well.  Simmer, stirring occasionally until the sauce has thickened a bit about 10 minutes.
 
Enjoy!  

A Better Green Bean Casserole

Tags

This year for the first time Mr. E and I went up to Wisconsin and visited Papa F, Mama J and the rest of Mr. E’s family for Thanksgiving.  In years past I’ll put together a small spread (turkey, 2 stuffings, mashed potato, sweet potato, fruit salad, gravy, veggies, rolls and 2 desserts –totally not overkill for 3-5 people right? 🙂 ) and my mom and any “orphans” will come and have dinner with us.  So of course right away I call Mama J to discuss menus and see what I dishes I can help make.  I would like to STRESS this is not me being a Kitchen Bully – I just like helping in the kitchen and making suggestions. LOL.

So… I get delegated the Green Bean Casserole… what? I have killer stuffing recipes – I make great desserts… what about apps – I EXCEL at apps – may I remind everyone of BaconFest?!  That’s right Mr. E and I created BaconFest.  Yes… Green Bean Casserole – well my friends I hope you know me well enough to know that there is no way I’m opening a can of green beans, a can of cream of mushroom soup and some pre-fried onion frizzles and calling it good!

This version is similar to one you may have seen on a pretty famous show on a cooking channel…the one where the actual recipe wasn’t shared… This is my rendition of it and it makes me and my taste buds pretty happy.

20131120_181850

First I minced the onion and cut a few of the mushrooms into small pieces and cooked them in butter in a big pot until soft but not browned.

IMG_2155

After you add the other ingredients you end up with a pot of creamy goodness!  You’ll see that the green beans aren’t cooked all the way; we like our veggies to still have a bit of crunch.  If you don’t like them crunchy, just sauté them a bit longer before you add the cream, sherry and cornstarch. The mixture will be a bit runny but that’s okay.

IMG_2157

When I made this the first time I poured it into a 9×9 baking dish, covered and placed in the fridge overnight.  The next day I pulled it out and let it sit until it was room temperature.  I then sprinkled parmesan cheese and plain bread crumbs on top and baked.  I don’t have a final picture because the end result doesn’t make a “pretty” picture, but the taste way than makes up for that!

Green Bean Casserole

Ingredients:
10 white button mushrooms – 6 diced, 4 thinly sliced
2½ tablespoons minced sweet onion
12 oz. fresh French Green Beans whole
1½ cups heavy whipping cream
1 tablespoons Cream Sherry (alcohol)
2 tablespoon grated parmesan cheese; I used Kraft in the jar
1½ teaspoon corn starch
1 teaspoon water
1 clove garlic, minced
Salt and pepper to taste
Plain bread crumbs for sprinkling on top
Extra grated parmesan cheese for sprinkling on top
Butter
 
Directions:
If serving right away, preheat oven to 350°.
 
In a big pot melt about 1 tablespoon butter, add onions and diced mushrooms and cook on medium-low heat.  You want the onions and mushrooms to become soft but not browned. 
 
Add the sliced mushrooms and green beans; cook 5-7 minutes.  We like our beans to still have crunch to them.  If you don’t, then cook a bit longer, probably closer to 10-15 minutes.  Add the garlic and cook for 1 minute.  Deglaze the pan with the Cream Sherry and cook for approximately 2 minutes.  Add the cream and parmesan cheese and bring to a simmer. 
 
In a separate small dish and right before you add to the cream/veggie mixture, combine the cornstarch and water.  Using a fork or a whisk stir until the lumps are gone.  Immediately add to the cream/veggie mixture.  Continue to simmer, stirring frequently for about 10 minutes.  The mixture should have slightly thickened.  It will be a little runny, but if it is very, very runny in a small dish mix an additional ½ teaspoon of cornstarch with 1 teaspoon water and add to the pot.  Cook for another 5 minutes. 
 
Pour into an ungreased 9×9 baking dish.  If serving right away, sprinkle the top with the extra parmesan cheese and bread crumbs and place in a preheated 350° oven and bake for 15 – 20 minutes until the edges are bubbly.  If serving the next day, cover and refrigerate. When ready to bake remove from fridge, and let sit until at room temperature.  Then top with parmesan cheese and bread crumbs and bake.
 
Enjoy!

Halloween Ideas & Treats – What worked and was worth it!

I hope everyone had a WONDEFUL Halloween! I spent most of September and October (and if I’m being truthful some of August) with my eyes glued to Pinterest and FoodGawker “pinning” and “heart-ing” every jack-o-lantern – ghost – witch hat – candy corn – caramel apple – Rice Krispy treat – decoration and dessert that had anything to do with Halloween.  I found so many cute things to do to my mantel, door, mirrors, windows and tons of fun and festive treats to make…I can’t wait until next Halloween to try some of them out!  Just kidding, while I do have multiple “pins” that I didn’t get to try I am happy to say that there were a few of them I did.

Thanks to Michaels (yea 40% off coupons) and the 99 cent store I was able to create this creepy scene above my cabinets… (The plates and upside margarita glasses which I already had made perfect “perches” for the crows)

IMG_2130

I had to go to a few more stores but it was still pretty inexpensive and I was able to create this scary mantle! IMG_2124

I knew I wanted to make some Halloween treats for my coworkers.  It was so hard to decide which festive treats to make but I ended up making Rice Krispy Frankensteins, Ghost Nutter Butters and Worm and Dirt Cupcakes. IMG_1730

The Ghost Nutter Butters are totally worth it and pretty easy – white bakers chocolate melted in the microwave and then dip the cookies in the chocolate. I found that balancing the cookie on a fork worked pretty well. I used the decorator gel from the baking aisle of the store for the eyes.  I would say you could make these 1 maybe 2 days in advance, but any earlier and the chocolate starts to look splotchy. Maybe the Arizona heat (?)

The worm and dirt cupcakes are quite cute, a little time consuming and very messy to eat…so pros and cons. Ingredients: cake mix, chocolate frosting, crushed Oreo ( I used the food processor) and gummy worms.  If you do make these and want it to look like the worm is coming out of the “dirt” buy the smaller worms (usually the generic or Walgreens ones) and then, after you bake and frost the cupcakes use the tip of a knife to make a wide hole in the frosted cupcake and push the worm in the hole a bit.  Then sprinkle the crushed Oreos “dirt” on top. The easy way – drape the worm over the frosting and cover with crushed Oreos 🙂

Lastly the Frankensteins…super ubber cute! However time consuming to dip the top in melted chocolate, draw the face and in real life those pretzel stick bolts do NOT stay put and it really stinks trying to get the pretzel sticks in the Rice Krispy.  In fact the only Frankenstein treat that had those was the one for the picture. LOL.  At the end of the day its a green Rice Krispy treat…eh…good but not great.

I hope you had a chance to try new things too!  Let me know if you discovered a particularly fun or good Halloween treat!

Sugar and Spice Nuts

Tags

, , , ,

There are a few reasons why I love Sugar & Spice Nuts.

  • Reason 1: Super easy to make;
  • Reason 2: If the Munch Monster (Mr. E) stays out of them, they have a good;
    shelf life.  Also, I have frozen them to use at a later date on a spinach salad or fancy lettuce salad with goat cheese and balsamic dressing.  In fact I’m munching on some I made in early July right now for “inspiration” as I write this.  (“Inspiration” being my excuse for why I’m stuffing my face with sweets);
  • Reason 3: They pack and ship really well, which is great for Mr. E and me because we like to send treats to family in WI and CA;
  • Reason 4: They are healthy-ish (nuts=protein=good for you).

Nuts revised

It took me awhile to find a recipe for sugared nuts that I really liked.  For me the orange peel and cinnamon mixed with the sugar make this the perfect combination.  An added bonus is how good the house always smells when they are baking.   Also, when looking for a recipe, I wanted the sugar to be coated on a little like candy.

The first time I made this I did mess up a bit.  The recipe instructs you to beat the egg whites until “frothy”… what exactly does “frothy” mean?? Is it slightly foamy? Is it very foamy and the egg white are holding soft peaks? Originally I took it to mean slightly foamy…WRONG!  As soon as I mixed in the nuts the egg whites went back to been a liquid mess.

So…the second time around and every time since I beat the egg whites on medium high until they are very foamy and have formed medium stiff peaks.  I’ve included two pictures below to help describe what I think “foamy” and “medium stiff peaks” means. 🙂

Foamy

IMG_1808

The rest of the recipe is pretty easy.  Mix the nuts in one bowl, the spices and orange peel (I use dried) in a second bowl.  Add the nuts to the bowl of foamy egg whites and add the spice mixture by gently folding it in a little at a time. You may decide not to use all of the spice mixture; it depends on how much flavor and sweetness you want.  Spread the coated nuts on a cookie sheet and bake; stirring every 10 minutes.

IMG_1810

Sugar and Spice Nuts

3 egg whites
2 tablespoons water
½ teaspoon nutmeg
1 cup sugar
½ teaspoon allspice
1 tablespoon cinnamon
1 teaspoon ginger
1 teaspoon dried orange peel
¼ teaspoon cloves
3 cups walnuts
1 cup almonds
2 cups pecans 
 
Preheat oven to 300° and grease a baking dish that is large enough for the nuts to be spread out and lay flat. 
 
In a large mixing bowl beat the egg whites and water until foamy and medium stiff peaks form. (See pictures above to help with the visual).
 
In a second mixing bowl add the nuts. In a third mixing bowl, add the sugar, allspice, cinnamon, ginger, dried orange peel and cloves and mix together
 
Add the nuts to the large bowl with the egg whites.  Gently fold them in until they are well coated.  Sprinkle the sugar and spice mixture over the egg white and nut mixture in batches, gently folding to incorporate throughout.  Depending on how sweet and flavorful you would like the nuts, you may or may not use all of the sugar and spice mixture.
 
Once you have coated the nuts with the desired amount of sugar and spice; spread them on the greased baking dish and place in the oven.  Back 20 to 30 minutes; stirring every 10 minutes.  They will be done when the coating starts to take on a lightly golden color.  Immediately remove from the baking dish and spread out on wax paper to cool.
 
Enjoy!

Good Kale Chips – Really!

Tags

It IS possible for Kale Chips to be good!  Who Knew??!  I have had many unfortunate taste experiences with Kale Chips.  I know I’m not alone given the number of times I had to say “no really, these are good, just give them a try” while trying to convince my friends to try the ones I made.

My motivation for making Kale Chips was the fact that my Kale plants are OUT OF CONTROL and I don’t know what to do with all the Kale.  I’ve already added it to soups, pastas, omelets and casseroles.  I tried a Kale salad, but I ended up spitting out my bite – maybe I just haven’t found the right dressing – Kale combination. 🙂 Raw kaleSo I did go through a few techniques (baking high heat, low heat, food dehydrator) and different seasoning combinations (spicy chipotle, plain salt & pepper, parmesan) before finding a winner.  The seasoning combination that includes parmesan cheese and baking was by far the winner! The food dehydrator was not a pleasant taste experience. (Poor Mr. E!)

The two important tricks to addicting Kale Chips are to make sure that the leaves are evenly coated with the olive oil mixture…

Coated kale …and that you don’t pull them out of the oven too soon.  The ones in the picture below aren’t done yet.

Kale

If they aren’t at the nice and crispy stage, they don’t taste as good.  This is a little tricky and takes paying attention because if you leave them in too long they burn and that’s not good either!

I tried to capture a good picture of the how the chips look when they are done, but I don’t know how well this came out…

Baked Kale 2

Kale Chips

2 Tablespoons Olive Oil
¼ Teaspoon finely ground sea salt (not the coarse ground)
1½ Tablespoon parmesan cheese
Fresh cracked pepper
1 bunch (about 3 cups) Kale, rinsed and leaves pulled off the stem; torn in “chip” size pieces
 
Directions:
Pre-heat oven to 325º. Line two baking sheets with parchment paper; set aside. I used two so that while one was in the oven baking I could be laying out the Kale pieces on the second sheet.
 
In a large bowl, whisk oil, salt, pepper and parmesan.  Add the Kale leaf pieces. I used my hand to mix; making sure each leave was coated.
 
In a single layer spread out the olive oil mixture coated Kale pieces on the parchment lined baking sheet.  Be careful that your oven racks aren’t positioned in the lower half of the oven.  I found that if I placed my baking sheet too close to the bottom of my oven, the chips burned.  Bake 5 minutes and then pull out the sheet and flip each piece over.  Place back in oven and bake another 5-7 minutes.  I found that I would need to pull off some of the chips that were done and then put the rest back in the oven to finish baking.  
 
I know this last step is a bit time consuming and a pain, but I found (with my oven at least) it made a difference and was worth it. 
 

I also experimented with mixing the olive oil with pepper, garlic salt, chili powder and a bit of cayenne and that was really good too!

Enjoy!