Homemade Enchilada Sauce

Tags

, , ,

EnchiladasSo, I’m a halfy – half a British, Irish, French mix and half Mexican.  Growing up we ate a lot of Americanized Mexican food – until I began cooking for myself I thought that the only way to season a lot of meals was to use a Lawry’s packet! (Fajita, Enchilada, Taco, etc.).  And there is nothing wrong with that! In fact, I still use the taco and fajita packets on occasion because the seasoning mixes are so tasty!

But…I have moved away from the enchilada sauce packet, not because it isn’t good, but because homemade is SO MUCH BETTER! (It also freezes fantastically so there is no reason not to make a bunch and freeze it).  Mr. E is reading over my shoulder right now and he has asked me to underline the “so much better” and add more exclamation points…I’m telling him I think the all caps is enough and that you all get that we “really like it”. LOL  I will share that Mr. E says (almost) every time I make it that he didn’t even like enchilada sauce until he tried mine.  🙂 Aww – he’s so sweet!

There aren’t that many ingredients in enchilada sauce…

Enchilada Sauce Ingrediants

It does require a few different “tools” and you will have a bit of a mess afterwards, but as Mr. E says – it’s totally worth it. (He does all of the dishes, so I can completely agree with this statement 🙂 ).You’ll need a blender, small mesh colander, and then some regular items like a rubber spatula, pan, measuring cups and spoons, big bowl.

The first step is to break the tops off the dried red chili peppers and throw them away. Rinse the chilies well to get out all the seeds.  It’s to taste how many mild and hot peppers you use, but even if you like really mild chili flavor, I suggest throwing in at least 1-2 of the hot’s just because of how the flavors meld.

In a big metal or glass bowl add the rinsed chilies and 3 cups boiling water.  Place a cover over the bowl and let steep.

Chilies

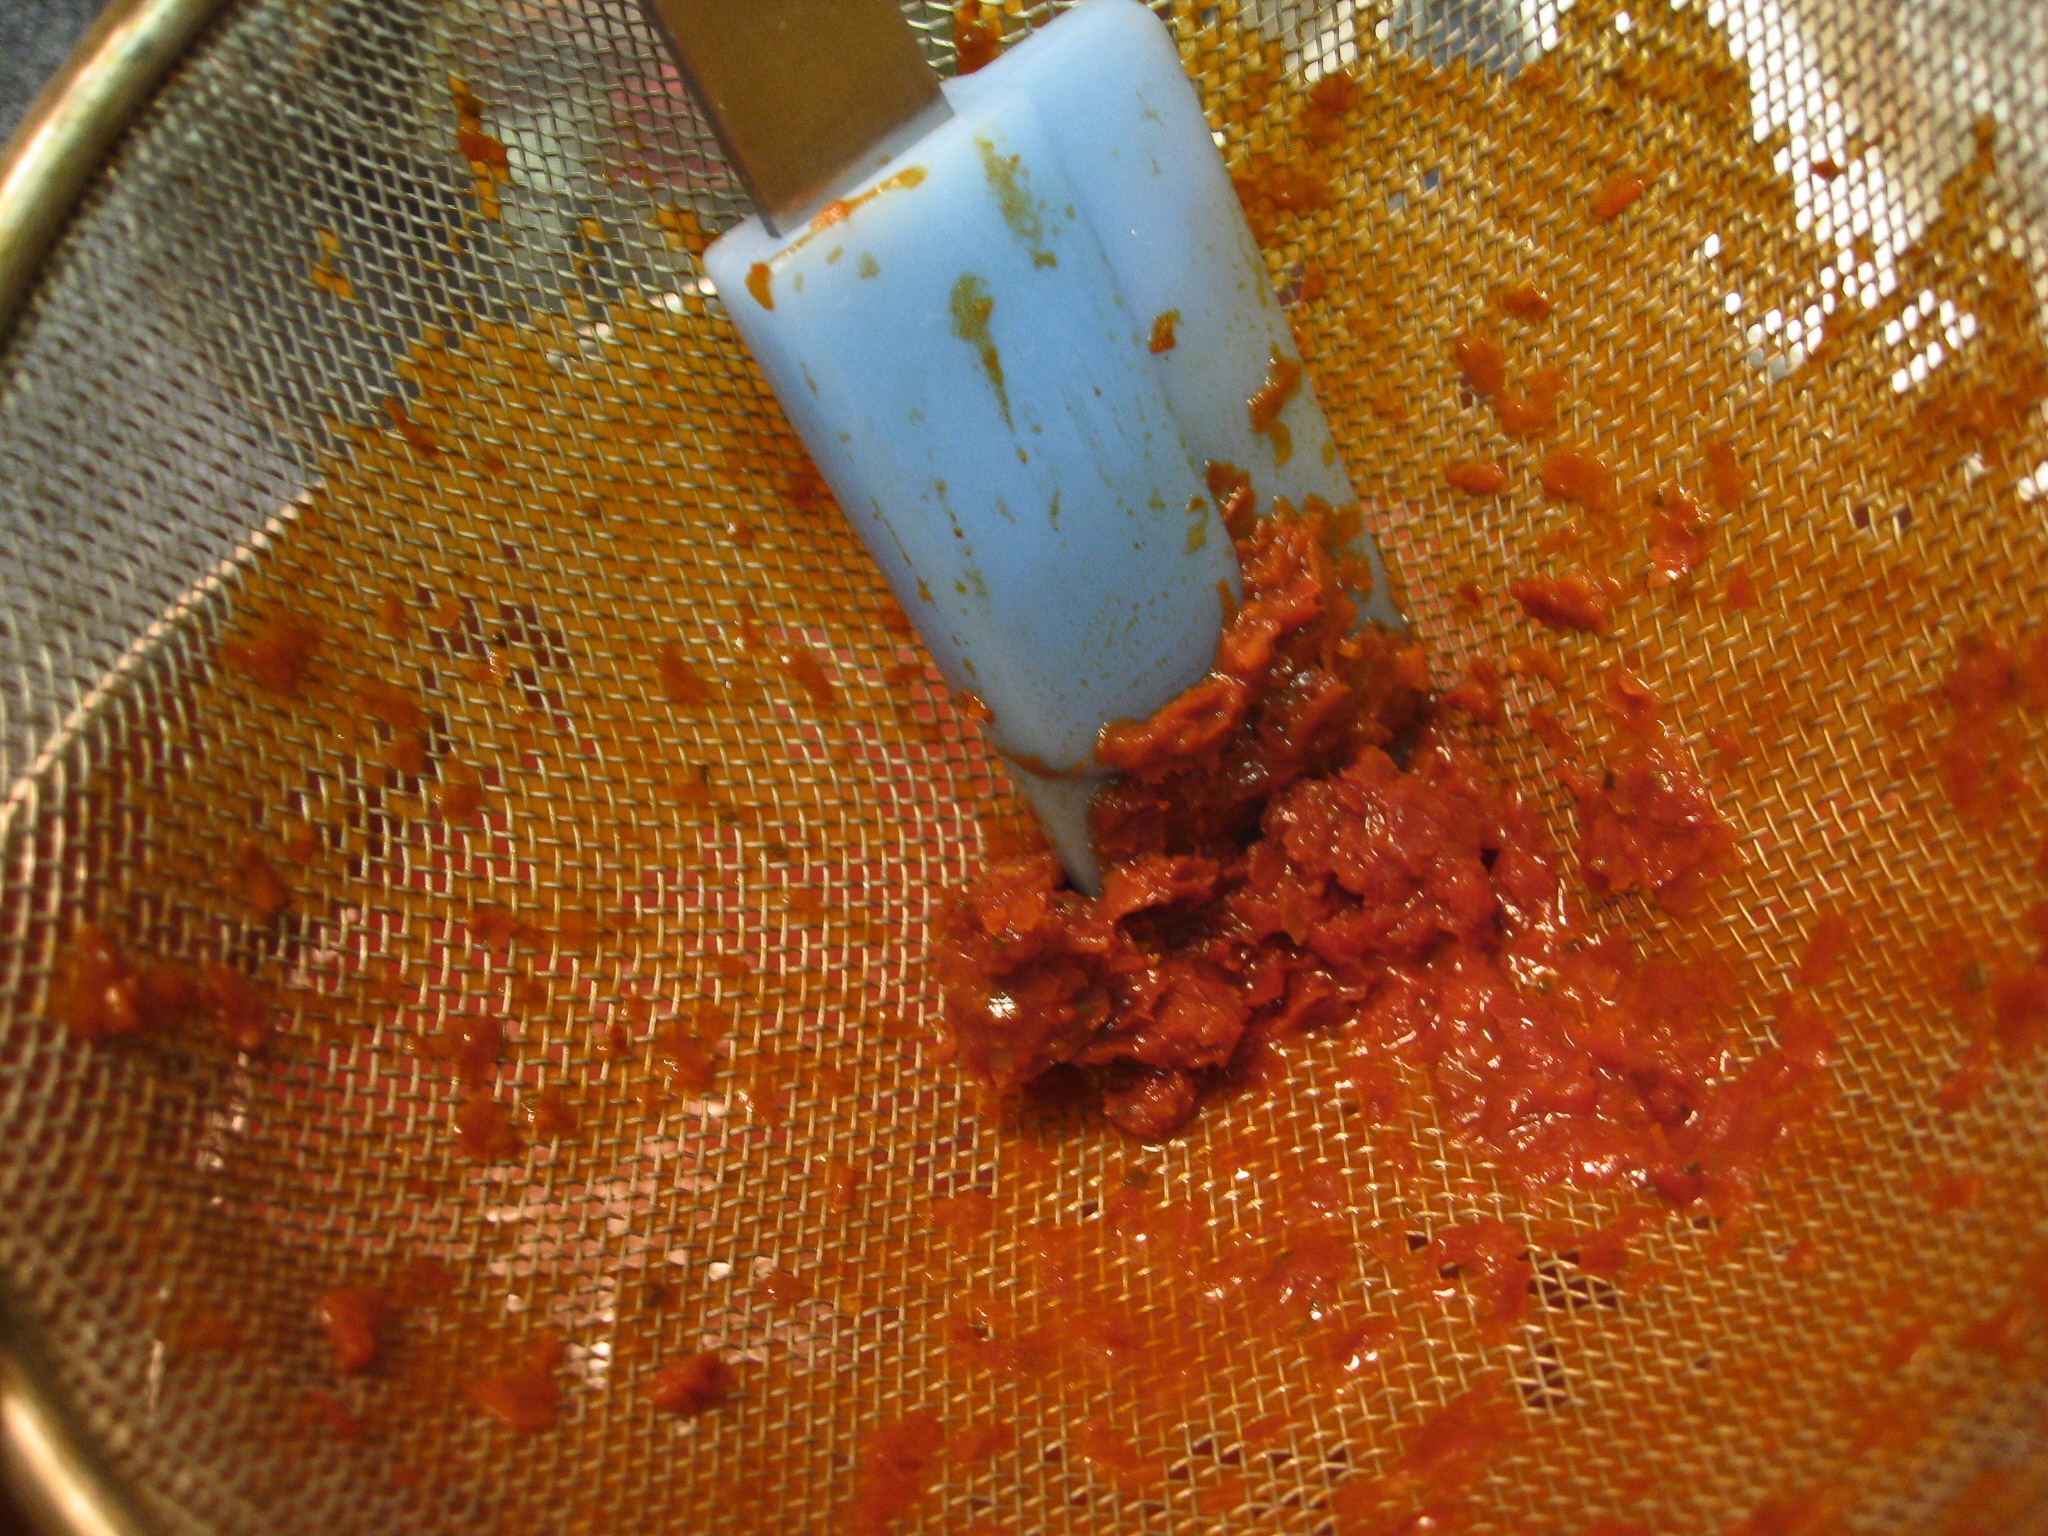
After the chilies are soft you’ll blend all of the ingredients together.  I think the skin on the chilies can add a bitter taste to the sauce, so I use a small mesh colander to strain the sauce through before adding to the pan.  I ladle about a cup at a time into the colander and then use a spatula to push the sauce through and toss the skin that collects in the colander.

Chili Skin

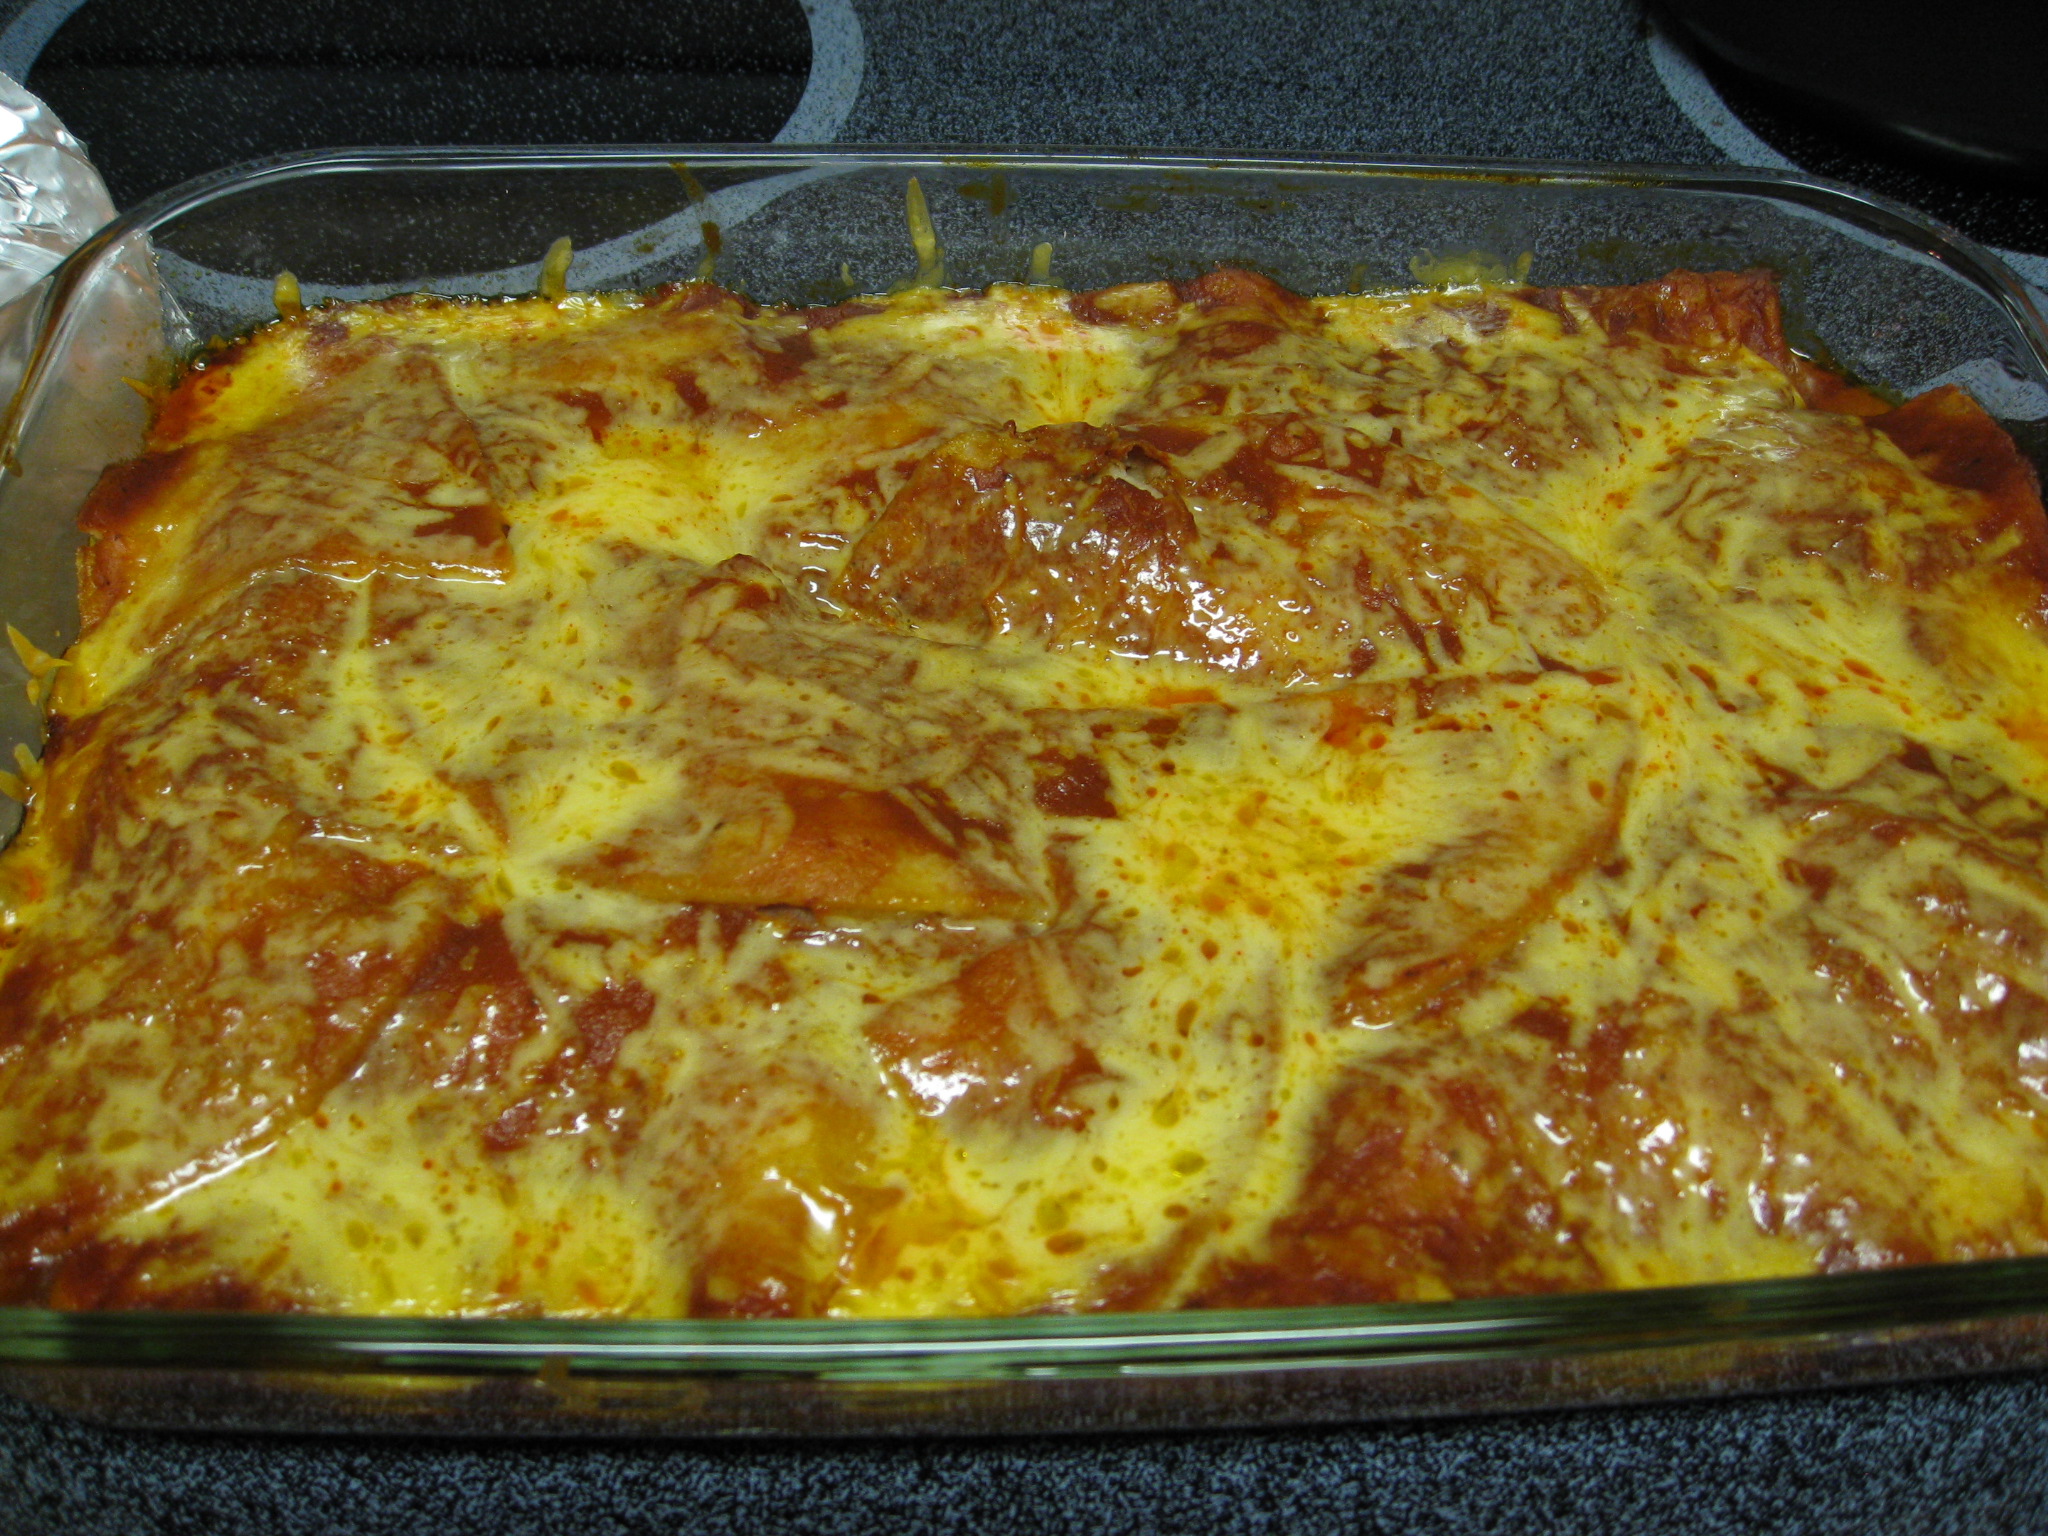
After that, I let it cook for about 10 minutes and then either begin making enchiladas or let it cool to freeze for later use.  I often double or triple this recipe and then freeze it in smaller portions so we always have sauce on hand.

Sauce

Enchilada Sauce

10-12 dried mild and hot red Chilies (ratio example: 8 mild and 4 hot)
3 cups boiling water
¼ cup tomato paste       
1 small garlic clove, peeled
¼ cup vegetable oil
1½ teaspoon salt
1 teaspoon Mexican oregano
¼ teaspoon cumin
 
Break off the tops of dried chilies and rinse thoroughly, getting all of the seeds out.  Place in a large heat proof bowl and add the 3 cups boiling water.  Place a cover over the bowl and let steep 10 minutes.   
 
In a blender add softened chilies, tomato paste, garlic clove, vegetable oil, salt, Mexican oregano, cumin, 1½ to 2 cups of the chili water and then 1 to 1½ cups of plain water (the total amount of water should equal 3 cups) .  The amount of chili water you add is dependent on taste and how flavorful you want the enchilada sauce.  I typically use 2 cups of the chili water and then 1 cup plain water.  Blend a minute or two. 
 
Using a small mesh colander held over a sauce pan, ladle some of the sauce into the colander.  Using a spatula press the sauce through the colander, this helps to collect the skin from the chilies.  Keep repeating this process, occasionally dumping the skin remnants into the trash and rinsing the colander when it gets to full, until the blender is empty.
 
Turn stove on medium and simmer 10 minutes, if the sauce gets too thick, add more water. Add more salt to taste and if it’s not quite what you’re used to, add a teaspoon or so of the Lawry’s enchilada seasoning. 🙂 In the past I have done it on occasion and it’s really good too!  Enjoy!


Hot Bacon Jalapeno Cheese Dip

Tags

, , , , ,

Every year for the Super Bowl Mr. E and I have a snack fest.  It doesn’t matter if we are having a party or if it’s just the two of us.  We make a bunch of snacky type food, plop down in front of the TV, pick a team and stuff our faces! Ha ha 🙂

This year we were CRAVING bacon.  I think we were both reminiscing about the years past when we had Bacon Fest.  (Yes – Bacon Fest – which is a wonderful party we threw a few years in a row where every food item, even the dessert, incorporated bacon!)  One of our favorites from those days was the Cream Cheese Stuffed Jalapenos Wrapped in Bacon.  So for the Super Bowl this year I decided to turn that into a dip – BEST IDEA EVER! LOL.

I started by roasting some of the biggest jalapenos I’ve ever seen and some banana peppers.

IMG_1849

While those were roasting, I cooked a half a package of bacon and, once cooled, crumbled it into small pieces.  I add this and the chopped peppers into a bowl with the cream cheese mixture.

IMG_1850

Then I poured all of this into a shallow baking dish.  When it was hot and bubbly, I pulled it out and served with tortilla chips.  “Yummy” is an understatement!   I really don’t know what this dip wouldn’t be good on. 🙂 It has great pepper flavor with a little bit of heat from the jalapenos.  The great thing about this recipe is if you wanted it hotter you could just add more jalapenos or even throw in a roasted serrano.

IMG_1857 Mod

Hot Bacon Jalapeno Cheese Dip

8 oz. cream cheese, room temperature
2 medium jalapeno peppers
2 medium banana peppers
½ package of bacon, cooked and crumbled
¼ cup sour cream
¼ teaspoon cumin
½ teaspoon paprika
 
Roasting the Peppers:
Preheat the oven to 425°.  Place the top rack in the upper half of the oven.  For my oven this is the second slot from the highest.   Place a metal rack (like one you may cool cookies on) in a baking dish and place the whole peppers (washed and dried) on the rack and put them in the oven.  Keep an eye on them; flipping them over so that all sides get browned and the peppers soften.  In my oven this takes 10 to 20 minutes.  Once they are browned and have softened, remove from oven and place in a paper bag to cool.  I’ve found this helps with peeling them later.
 
Once cool, peel, seed and chop the peppers.  Set aside
 
Making the Dip:
Preheat oven to 350°.  Using a mixer, blend the cream cheese until smooth.  Add the sour cream and mix well.  It is important to get the lumps out  or else sometimes they won’t melt right when heated and the consistency will be off.  Then add the cumin and paprika and mix well.  Add in the chopped chilies and crumbled bacon and stir by hand.  Scoop into a shallow baking dish and bake about 20 minutes or until hot and melted.  Serve immediately with chips and enjoy!
 
**As a side note – this would heat up perfectly in a small slow cooker and then stay warm the entire time.  AND if you have those slow cooker plastic liners that you can find at the grocery store; then clean up would be super easy!


“Stained Glass Candy”

Tags

, , , , ,

This “candy” is a Christmas tradition around our house going back to when my mom was little and she would make this with her mom! I know its past Christmas but maybe this real intrigue you enough to add it to you baking list for next year or maybe even try it for some mid-year cheer.

So I have the name, “Stained Glass Candy” quoted because this is not the name I grew up calling it. In fact my mom threw a bit of a fit and got a little uppity with me when I told her I was re-naming it! 🙂 So,  the real name of this is….and please, please don’t judge it by its name…but…it’s called Uncooked Fruit Cake.  Wait!! Before you go running- I don’t like fruit cake either but this is different.  I PROMISE!!! 🙂

IMG_1838

This recipe makes a lot and freezes perfectly, which is great because it does take a bit of time. My mom and I always make this together as part of the tradition, which does help it to get done quicker.  Another part of the tradition is that we crush the graham crackers in a zip lock baggy with a rolling pin.  You may be thinking poor girl doesn’t have a food processor – surely she would use that instead.  You would think – but No, we do it with a rolling pin while my food processor continues to collect dust in the cabinet!

(If Mr. E sees this post he will quickly add my food processor to the garage sale pile.  I’ll have to make something soon that uses it so I can justify its continued existence in my cabinet. )

The first time we made this I didn’t know what my mom was talking about when she said we need the packages of candied cherries, pineapple and peels, so I’ve included a picture of what the containers look like to help.

IMG_1836

After crushing the graham crackers we mix those with the cherries, pineapple, dates, raisins and citrus peel in the roasting pan.

IMG_1812

Then we added the melted butter, marshmallow, brandy, whipping cream mixture. The mixing part is really hard and this is another reason to make it with someone – you can take turns mixing!

Once mixed, we placed log shaped portions on pieces of wax paper that had a dusting of powdered sugar on the bottom.  We then used a small mesh colander to dust the top with powder sugar.

IMG_1821

Using the wax paper we pressed on the sides of the log and then rolled it up in the wax paper followed by wrapping each one in foil.  This candy is really rich but oh so delicious with its graham cracker flavor!

Stained Glass Candy

1 lb. Honey Maid graham crackers. (In my opinion this is a recipe where the name matters) finely crushed.
2 cups total of red and green glazed cherries (not maraschino)
1 cup glazed pineapple
1½ cups dried dates, cut into pieces
⅔ cup white or golden mixed raisins
1½ cups total of candied orange peel and lemon peel
16 oz. marshmallows
Brandy extract
1/4 lb. (half a stick) butter
1/2 pint heavy whipping cream
Powdered sugar
Wax paper
Foil
 
In a big roasting pan – yes a roasting pan, it makes mixing easier – add the finely crushed graham crackers, raisins, cherries, pineapple, candied peel and dates and mix well.  In a microwave safe bowl melt the butter, marshmallows, brandy extract and whipping cream in the microwave in 30 second intervals – stirring well after each interval until melted.
 
Once the marshmallow mixture is melted add to the graham cracker mixture and mix well.  Try using a big mixing spoon or even a spatula.  If it seems really hard to mix it, that’s normal.  The consistency should be moist enough that it will hold together and a little sticky to the touch.  However, depending on how much liquid is in the candied fruits, you may need to add more crushed graham cracker; the mixture should not be overly moist.
 
**See the picture above for help with this next part** 
 
Place a sheet of wax paper on the counter.  Using a fine mesh colander dust the wax paper with powdered sugar almost to the edges.  Using a spoon scoop some of the graham cracker mixture in a row along the center of the powdered sugar dusted wax paper.  Use the sides of the wax paper and moderate pressure; press and shape the mixture into a log.  Thoroughly dust the top and sides of the log with more powdered sugar.  Then roll up the wax paper, tucking in the sides and wrap in foil. Refrigerate at least 4 hours, preferably overnight.  If freezing, put directly in the freezer.  It lasts about 2-3 months if wrapped tightly.  When ready to enjoy, (thaw if necessary) slice thinly and serve!
 
Enjoy!
 

Korean BBQ tacos with Cucumber and Pomegranate Kimchi

Tags

, , , , ,

Every year I see pomegranates in the store and I always want to get one but can never think of what to do with it. I’ve looked up various recipes and some look good; some look okay, but nothing that really seemed worth it.

I remember as a kid in elementary school we use to get them and us girls would pick out the seeds and eat them staining our fingers and lips with their beautiful purple color. The boys would eat a few, but had much more fun throwing them either at each other, at us or at the stucco walls of the building and watching them explode.  Pomegranates soon became banned from school…I think that may have been the last time I had them.

I was excited when I came across a recipe for Korean Barbecue tacos with a Pomegranate-Cucumber Kimchi posted in the AZ Republic from POM.  I didn’t have some of the ingredients the recipe called for (and wasn’t going to buy them) 🙂 so I ended up making a modified version if the original recipe.  It was so very good!  In fact with the next night we used the leftover steak and cucumber kimchi to make an Asian salad.

IMG_1754

The other thing that was good about this recipe was that even though the ingredient list is long it’s really easy to make. The part that took the longest was getting the seeds out of the pomegranate. Which I included a tip below that really helped me.

The original recipe calls for a sweet chili sauce to be added to the kimchi, but that was one of the ingredients I didn’t have so I improvised by adding Sriracha sauce and more honey

IMG_1747

I was feeling lazy, so I didn’t pull out the mandolin to slice the cucumbers, but it would have been so much faster if I had. I made the kimchi first and then the marinade for the steak, so the kimchi probably sat for a 1 ½ hours. Word of warning the ginger and spices get a lot stronger as it sits.  Mr. E and I love ginger and spicy foods so we were okay, but if you don’t like spicy food, you’ll want to cut down on the amount of ginger and Sriracha.

IMG_1752

Korean Barbecue Tacos with Cucumber Pomegranate Kimchi

 
Kimchi:
¼ cup pomegranate arils, or seeds
½ cucumber, thinly sliced
2 tablespoons seasoned rice wine vinegar
½ teaspoon Sriracha
1 teaspoon honey
2 small garlic cloves (or 1 large), pressed
½ tablespoon ginger, minced
1 tablespoon water
½ teaspoon red pepper flakes
1 tablespoon chili powder
 
Steak Marinade:
¼ cup pomegranate juice
¼ cup soy sauce
3 tablespoons white sugar
2 tablespoons seasoned rice wine vinegar
1 tablespoon Sriracha sauce
4 garlic cloves, minced
4 tablespoons lime juice
2 teaspoons sesame oil
½ cup brown sugar
1 pound top round steak
 
Other Ingrediants:
Corn tortillas
Cilantro, for garnish
Limes, sliced, for garnish
 
**Tip for getting the seeds out of the pomegranate***
 
Fill a big bowl with water. Score the outside of the pomegranate with a knife. Then break apart the pomegranate under the water in the big bowl.  The seeds will sink to the bottom, and the other stuff will float. 
 
Kimchi: Slice the cucumber very thinly and set aside. In a medium to small size bowl add all the ingredients for the kimchi except the pomegranate seeds and the cucumber.  Use a whisk to mix well.  Then add the cucumber and pomegranate seeds, stir so that all of the cucumber slices get coated.  Set aside and refrigerate.
 
Steak Marinade: Trim any excess fat off the steak and set aside.  In a medium bowl, whisk together all of the ingredients for the marinade.  Pour the marinade over the steak.  I used a zip lock baggie for marinating. Let sit 1-2 hours in the refrigerator.
 
When ready to grill the steak, remove it from the fridge a few minutes before so that it can come to room temperature.   Lightly oil the grill grates and then grill the steak to your ‘cooked’ preference.  After removing from the grill, let rest for 5 minutes.  Then thinly slice.
 
To serve, heat up the tortillas, add the sliced steak, Kimchi, a bit of cilantro and a squeeze of lime. 
 
Enjoy!

Is Aerogarden Gardening Cheating?

Tags

If I used an Aerogarden seed starter kit for my fall garden, is that cheating?  My friend would whole heartedly say “YES”, but she also works from home, has a flexible schedule and is able to devote time every day to her garden.  She also has a huge back yard and has turned a good amount of it into a garden; she even built raised garden beds and irrigation systems! (I’m green with envy :))

Maybe it’s cheating, maybe it’s not.  It’s not like I’m talking about making homemade spaghetti and then opening a jar of sauce.  Kidding – Ha Ha; who hasn’t done this at least once??? 🙂  Regardless of if it’s cheating or not, I love my Aerogarden!  It is so easy to do the seedlings and they grow so fast.  This is 4 days after starting the seedlings in my AeroGarden…

Aerogarden seedlings

This fall I am trying to grow Kale, Lettuce, Beets, Tomatoes, Carrots, Squash and Cantaloupe!  I’m pretty sure this is the wrong season for growing some of these (maybe most of them) LOL.  But I have little lights and a plastic cover which will turn the raised gardens into a kind of greenhouses – at least in my mind it will; I may be making this idea up in my head .  I sometimes do that.   The only seeds I planted directly into the soil are the carrots.

Two weeks after starting the seeds in the Aerogarden…transplanting time!  Mr. E. in all his fantastic-ness threw out all of that poop dirt in my raised gardens and replaced it with good soil.  (Thanks Mr. E.!)

Tomatoes, Beets & Carrots

Lettuce, Kale & Beets

I think I read somewhere that carrots love tomatoes… or maybe that was a title of a book that talked about companion gardening.  The author wrote two books and I think the other one was Roses Love Garlic?  Sound familiar? Anyway I planted carrots all around the tomatoes and just 3 weeks or so later…

Tomatoes & Lots of Carrots

I’m really excited for all of these, but realistically I think I only have a good chance of ‘enjoying the veggies of my labor’ (such a nerd) with the carrots, kale and maybe the beets. One of my squash plants is going crazy so maybe we’ll get something out of that!

Happy Fall!!

Peppers Stuffed with Quinoa and Turkey

Tags

, , , ,

This recipe is an adaptation of a recipe Mr. E found in the Milwaukee Sunday paper.  I’d like to say ‘Thank You’ to Mr. E for always being on the hunt for new recipes for us to try!  I’d also like to extend a special ‘Thank You’ to Papa F (Mr. E’s dad) for only putting up a minor fight when Mr. E cut the recipe out of a section of the paper Papa F had yet to read.  I believe it went something like this, Papa F “Aaaggghhhhhh – WHAT are you doing???” Mr. E “Cutting out a recipe.”  Papa F “Aaggggaahhhhh – I haven’t seen that section yet….what’s on the back???”   Mr. E “It’s the food section, you weren’t going to read it any way.” Papa F “Humph.” LOL LOL. 🙂

This recipe was so good. I could totally see this becoming part of the regular rotation.  While this does call for ground turkey, and we did use it, we both agreed that it would have been equally as good without.  The ground turkey added texture which I think could easily be replicated with maybe chopped mushrooms or more chopped veggies.

For convenience I made the quinoa the night before.  I followed the directions on the back of the box using chicken broth instead of water.  I also halved the recipe since there is only Mr. E and I.  Quinoa is super easy; just remember it’s a 2:1 ratio. For every 1 part dry quinoa add 2 parts liquid.

This recipe didn’t originally have a sauce, but when I sautéed the onion, reserved bell pepper pieces from the cut off tops, turkey, garlic and seasoning I noticed there was a ton of filling! And, that was before adding the quinoa and tomatoes! I decided there was plenty to divide and turn half into a sauce! So, I added half of the tomatoes and approximately half of the paste to the skillet and mixed all together.  I then removed half of that mixture and set aside.  To the remaining mixture I added the quinoa.  Look how yummy!

I then stuffed all of the quinoa mixture into the peppers and set in the oven.  In the same skillet (it was my turn to do the dishes, so there was no way I was dirtying another one!) I added back the turkey mixture, the rest of the tomatoes, paste, some water and seasonings and just let it simmer while the peppers cooked.

Though it would have been good without, we were both really glad to have the sauce!

Quinoa and ground turkey stuffed peppers

1/2 cup quinoa
1 cup chicken stock
3 bell peppers- we did 2 green and 1 red
2 garlic cloves or 1large clove
1/4 sweet onion, chopped
¾ pound ground turkey
1 can diced tomatoes drained, reserve liquid
3 oz. tomato paste
1 teaspoon basil (½ for the stuffing and ½ for the sauce)
1 teaspoon thyme (½ for the stuffing and ½ for the sauce)
Salt and Pepper to taste
Olive oil
 
Preheat oven to 375°.  Grease a baking dish with oil.  I used an 8×8 since I was making a small batch. Also, you’ll want to be able to stand the peppers up in the dish, if you lay them on their side the filling starts to fall out.
 
Cook quinoa according to package directions, but using chicken stock instead of water.  Cut the tops off the bell peppers and remove the stem and seeds. Chop any extra pepper from the tops and set aside.
 
Over medium high heat, use a skillet with some olive oil in it to sauté the onions and chopped peppers.  About 5 minutes or so, just until the onions start to brown.  Add garlic, basil and thyme, just cooking until fragrant about 30 seconds to 1 minute.  Add turkey, salt and pepper and cook until meat is browned.  Add half of the tomatoes and half of the tomato paste and cook until most of the liquid is absorbed, mixing well. 
 
Remove half of this mixture and set aside to use in the sauce. 
 
Add cooked quinoa to the remaining turkey mixture in the skillet and stir thoroughly.  I found this mixture to be a bit dry so I added a little of the reserved liquid from the canned tomatoes. Fill each pepper with the mixture, place in baking dish, cover with foil and bake about 30 minutes until the peppers are tender and can be pierced with a fork.
 
While the peppers are baking, add the reserved turkey mixture to a skillet over medium low heat and mix in the remaining tomatoes, paste, remaining basil and thyme, salt and pepper to taste, a few teaspoons of the reserved liquid from the canned tomatoes and about ¼ cup of water or so.  Let the sauce simmer, adjusting spices to suit taste.

 Enjoy!

Banana Bread & Dirty Monkey Drinks

Tags

, , , , ,

Mmmm Banana Bread.  Who doesn’t love Banana Bread? I posed this question to Mr. E the other day and he answered “crazy people – that’s who!!” I agree 🙂

Mr. E and I have a habit of buying bananas (more than we would ever eat in a week) and, of course, never eating them all.  Mr. E, in his effort to not waste food, throws them in the freezer. We currently have about 10 bananas (with the peels on), all black and not pretty looking in our freezer and… I need the freezer space.  So when I suggested Banana Bread Mr. E did a happy dance and when I said Dirty Monkeys he straight up squealed!!  Okay, so maybe he didn’t squeal but I sure did. Yes I squealed at my own suggestion! LOL They are that GOOD!

What was that? Did I hear you ask “what’s a Dirty Monkey?”  Only my favorite drink from St. Lucia!!   Imagine a glass of blended deliciousness.  For 2 drinks the recipe is (approximately): 1 large banana, 2 shots of Kahlua, 1½ shots of white rum, ice and a bit of milk or if you are feeling indulgent 1 scoop of ice cream. (I’m usually feeling indulgent). 🙂  Then blend!

The Banana Bread recipe is an easy – no yeast, one bowl recipe. You can make it more complex if you want and get all fancy with a bunch of different bowls, but it’s really not necessary.

I pulled the bananas out of the freezer, let them sit on the counter for about 10 minutes, peeled them and dropped them whole into my Kitchen Aid mixer.  I mixed for a few minutes until they were slightly mashed looking.

To the bowl I added the sugar, egg and melted butter.  Mixed until blended and then added the flour and baking powder (I used a colander to sift the baking soda to catch lumps). Mix well.

I decided to make small loaves so they would bake quicker.  My favorite is to eat a slice warm with a bit of butter spread on top.  Hope you enjoy!

Banana Bread Recipe

3 large ripe bananas mashed – about 1cup
1 cup sugar (I use a little less if using really ripe bananas)
1 egg
4 tablespoon melted butter – cooled
1½ cup flour
1 teaspoon salt
1 teaspoon baking soda
 
Grease loaf pan.  Preheat oven to 325°.
 
To a mixing bowl add bananas (either mashed or if using a stand mixer, like a Kitchen Aid, whole and use the paddle attachment on low to mash them up) and sugar and mix well.  Add egg and melted butter, mixing well after each addition.  Then add flour, salt and baking soda (make sure there aren’t any lumps in your baking soda) and mix until combined. 
 
Pour into greased loaf pan and bake for 55 – 60 minutes or until a toothpick comes out clean when testing for doneness.
 
**The bake time for the mini loaves in the picture above was about 25 – 30 minutes.**  

Zucchini Bread

Tags

, , , ,

Zucchini bread is one of those things that I grew up having and is total “memory food”. You know, that food that you love because it takes you right back to a good memory or reminds you of a good time in your life.  I remember as a child mosey-ing to the kitchen in the morning, after deciding I was ready to face the world (even as a child I loathed mornings), and there it would be!  A thick slice, lightly toasted with just a thin layer of butter melted into the top…mmmmm.  I think the secret is adding pineapple!  I’ve tried other zucchini bread recipes and they’re nice but not, yes I’d like another slice and in fact just give me the whole damn loaf good. 🙂 

This is a really easy recipe! There are a few tricks my mom and I have learned over the years; 1. sifting the baking soda into the flour mixture is a must (nothing is grosser then getting a bite with overwhelming baking soda flavor); and 2. using pineapple rings and then cutting them up instead of just buying crushed.  The reason the extra work is worth it, is that I have found that the rings are better quality pineapple whereas the crushed sometimes you get bits of core. It’s not my favorite to bite into a bread or any dessert that has pineapple in it and you hit that hard, stringy core that you just can’t chew through and end up spitting out.  (I suppose if you’re a lady, you swallow it, but when it comes to “yucky” I’m a spitter. lol 

Zucchini Bread

Yields 2 loaves
3 eggs
2 cups sugar*
1 cup oil
2 teaspoons vanilla
3 cups flour
1 ½ teaspoons baking soda
1 teaspoon nutmeg
2 tablespoons cinnamon
1 teaspoon salt
¾ cup diced pineapple, well drained
2 cups grated zucchini, I use the large hole side of my grater
1 cup raisins
 
*If I’m feeling really healthy I reduce the sugar to 1⅔ cups, but most of the time I leave it at the 2 cups and just enjoy it as sweet bread.
 
Preheat oven to 350°.  Mix the dry ingredients together, sifting in the baking soda. In a separate bowl, beat the eggs and sugar until fluffy.  Add oil and vanilla and continue beating until thick and foamy.
 
Add the flour mixture to the egg mixture and mix well.  Gently fold in the pineapple and zucchini.  Lastly fold in the raisins.
 
Pour mixture into 2 well-greased loaf pans and bake for 50 – 60 minutes.  I rotate halfway through the baking because I don’t have a convection oven and my oven does not heat evenly.  Test for doneness using a toothpick; you’ll want the toothpick to come out pretty clean, a few crumbs is okay too. 🙂

Sad Summer Garden

Tags

Our summer garden did not go well this year. 😦 The Pak Choy, 1 green bean and 1 baby carrot is all we got.  I blame it on 3 things (4 if I count myself).  Horrible brand of soil, white flies and the rain. (Really you could combine the white flies and rain into one because they are linked.

First the soil…this soil had so much ‘fertilizer’ aka chicken poop that it poisoned my beautiful tomato plants – killing them within 4 days! (Supposedly, the owl makes the birds nervous…I’m not sure I’m believe that)

It also killed my kale and one cauliflower plant.  Not to mention the stink!  I could smell it from my front yard and the SWARM of flies was so disgusting Mr. E when out there with one of those sticky bug traps and was swiping it over the soil.  I am not even exaggerating when I say he caught 20!

Poopy Garden Soil

So a little background on the white fly problem, in the summer I can’t get lady bugs because it’s too hot to ship them so I usually use this organic, soap type spray, but I ran out and when I went back to the store they didn’t have it and sold me this other product.  Which I used and it did help, but I wouldn’t say eliminated the problem.  And then it rained, and then rained some more and then some more.  I couldn’t believe how wet it was this summer; which would normally be a good thing except, it washed all of that white fly b-gone spray off the leaves and into the soil.  BAM the rest of my plants drooped and died within a few days.

The only plan that didn’t die was the Chernobyl Swiss Chard – this plant was out of control!  (That beast of a plant in the picture is the Swiss Chard!) It survived an entire growing season, a transplant, white fly b-gone spray, 2 Arizona summers and a forgetful gardener (that me 🙂 ).  I ended up just pulling it out because the leaves were bitter from being old.  Check out this root system – CRAZY!

So, now Mr. E and I are prepping the garden for this fall.  I have my AeroGarden seed starter kit, which just arrived – I’m so excited.  (Yes, I’m a garden cheater)  So now we are in the process of replacing all of that poo saturated soil and deciding what to plant and where.  I think the vote is squash, some leafy things like lettuce and spinach, green beans, herbs and I think beets.

Smoked Pork Party 2012

Tags

Any opportunity Mr. E has to smoke some meat he is all over.  Labor Day weekend was no exception.  We decided to have a few people over and celebrate the long weekend and end of summer – well end of summer for some parts of the country, but here in Phoenix we have a few more weeks of temps in the upper 90’s, low 100’s.  First food idea Mr. E throws out is grilled pizzas. Now I love grilled pizzas, but the thought of cooking enough to feed 12 to15 people (mostly of the male, I eat a ton of food, species) did not appeal at all.  Second idea – smoked pork.  Ding ding ding winner winner!   Do I even need to count the reasons: 1. delicious; 2. easier than pizza; 3. delish… soooo, we smoked some pork, a 12.6 pound pork shoulder roast to be exact. Mr. E is becoming quite the smoker aficionado and got up at 5:15 on Sunday to make sure the roast would have at least 11 hours of cooking time.

He’s such a trooper! I wish I could say that I was a rock star girlfriend and got up to help, you know make him coffee and breakfast, but that would be a lie.  I made sweet, sweet mimi sleepies until almost 8. When I did wake up I was my wonderful cheery self, having gotten a full almost nine hours of sleep. Rumor is I’m a bit of a grouchy beast when I’m tired (not sure I believe this but whatev)

We went both the BBQ pulled pork route and the carnitas route and had all the fixings for both! The pork was so tender Mr. E didn’t even need the fork to pull off pieces!

For the BBQ eaters we had homemade Stewie sauce (yes my little dog has a BBQ sauce named after him lol), BBQ beans and rolls.

For the carnitas’ lovers we had queso fresco, cilantro, 3 different salsas, pinto beans and cabbage. We kept it pretty simple by buying most of the salsas.

For pre-dinner snacks, I made totally delicious warm bacon cheese dip, which has sort of become a staple at our party’s since Bacon Fest 2010.   Then our friends brought a ton of yummy dips. I could not stop eating them and made a complete PIG out of myself!  Taco dip – which the first time I saw I was like “are you kidding me” because it doesn’t look or sound like it would be awesome, but it is and is so addicting! A super yummy queso dip, a kicked up version of cold spinach dip with bacon (why didn’t I ever think of that??), a mango salsa which HAS TO become a staple at our parties and onion dip.  I mean really is a party ever complete without onion dip – I think not 🙂 I think it’s fair to say this was a two part party: part 1 – dip extravaganza; part 2 – pulled pork heaven.

For something sweet afterwards: Chocolate and Lemon whoopie pies and ooey gooey bars (note to the friend that made the gooey bars – feel free to make 2 batches and we can hide one for later :)).

We are so lucky to have such wonderful friends that love food and get togethers as much as Mr. E and I do!

Hope everyone had a wonderful extended weekend! Is anyone else ready for fall and the holidays??? I know I super excited to try some of the Halloween treats and crafts I’ve been finding online!